Defines settings related to the Data collect external workflow.
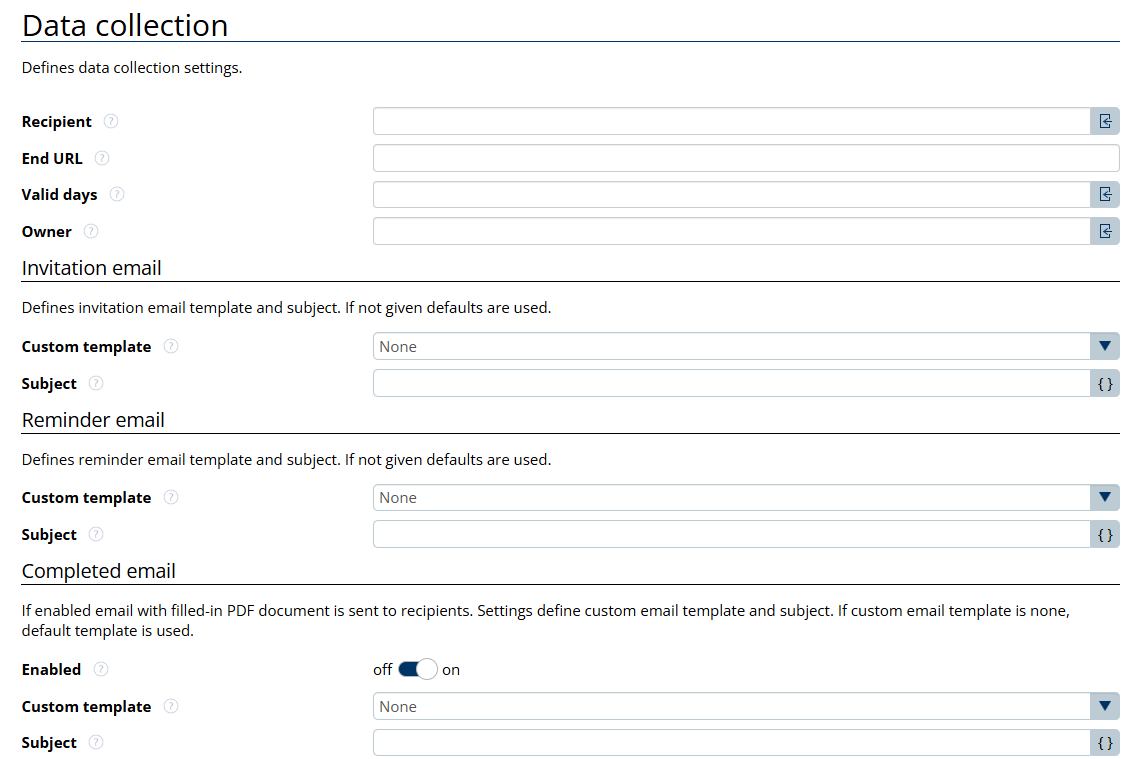
Recipient
The ID of the user receiving the document link.
End URL
The URL to which the signer is redirected to after either viewing the document or signing it. If no address is entered here, the user will be directed to the Documill website.
Valid days
The number of days the signing link remains valid. By default, the signing link expires 30 days after sharing, and the document can no longer be viewed or signed.
Owner
Specifies the owner of the sign request. This person will later receive notifications through email if the document has been rejected or signed. If not defined, the user generating the document will be the owner of the sign request.
Customize Email Contents and Subjects
Custom email notifications enable organizations to maintain brand consistency with logos, colors, and fonts, communicate in their preferred language, and offer editable sections for personalized messaging. This customization enhances engagement, reduces errors, and automates communication, minimizing manual follow-ups. These features make Documill Dynamo's email notifications versatile and adaptable across different industries and workflows.
|
Custom email |
When it is used |
|---|---|
|
Invitation |
To notify recipients that a document is ready for their input, providing a direct link to the document. |
|
Reminder |
To gently remind recipients to fill-in the document, ensuring the process stays on track. |
|
Completed |
To inform all parties that the document has been successfully submited and the process is complete. |
|
Rejected |
To notify document owners that the document has been rejected, with details on the next steps or required actions. |
How to create email notification templates
In the Template Builder, in the Emails section of the Home tab, click on New in Email

Once inside the email template editor, you can start customizing the email content. Input your own content with dynamic data, images, paragraphs, etc. same as creating Document templates. Since Email Templates are also based on HTML, you can switch to HTML mode for more advanced customization.
Custom emails do not contain the document link by default. Reffer to the Email with link template to see how a link is added. The template can also be cloned by right clicking on it and selecting Clone.

Configure Invitation Email
Defines the template and subject for the email sent to invite the recipient to fill in the document. This email is used when the document is shared to the recipient.
-
Template: Define the email content for the invitation email. Any created custom emails will appear on the list for selecting. For example, if the option 'None' is chosen, the default sign request email will be used.
-
Subject: Define the subject for the invitation email. Expression language can be used to add dynamic data to the subjects. The subject must be inside single quotes. Example:

Configure Reminder Email
Defines the template and subject for the reminder email sent to the recipient. This email will be sent when the owner of the document or the one who initially shared it clicks on the ‘Send reminder’ button on Document view.
-
Template: Define the email content for the reminder email. Any created custom emails will appear on the list for selecting. For example, if the option 'None' is chosen, the default sign request email will be used.
-
Subject: Define the subject for the reminder email. Expression language can be used to add dynamic data to the subjects. The subject must be inside single quotes. Example:

Configure Completed Email
Defines the template and subject for the email sent when the data collection process is completed. This email will be sent both to the owner or the one who initially shared the document and the recipient. Also, the completed document is attached for download.
-
Enabled: The completed email delivery can be either turned on or off for the recipient.
-
Template: Define the email content for the completed email. Any created custom emails will appear on the list for selecting. For example, if the option 'None' is chosen, the default sign request email will be used.
-
Subject: Define the subject for the completed email. Expression language can be used to add dynamic data to the subjects. The subject must be inside single quotes. Example:

Configure Rejected Email
Defines the template and subject for the email sent when the signing request is rejected.
-
Template: Define the email content for the completed email. Any created custom emails will appear on the list for selecting. For example, if the option 'None' is chosen, the default sign request email will be used.
-
Subject: Define the subject for the completed email. Expression language can be used to add dynamic data to the subjects. The subject must be inside single quotes. Example:

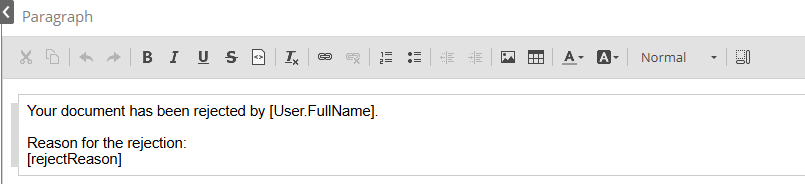
In the default rejection email, the rejection reason provided by the signer is also included, this is not the case for custom rejection emails. If the reason needs to be included in a custom rejection email, it can be done as such:
-
Create a custom rejection email with a placeholder for the rejection reason ([rejectReason]).
-
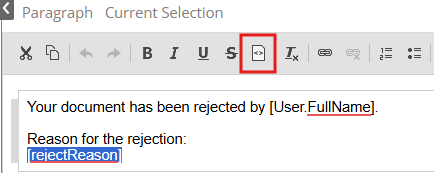
Highlight the placeholder and create a span by clicking on the span icon.
-
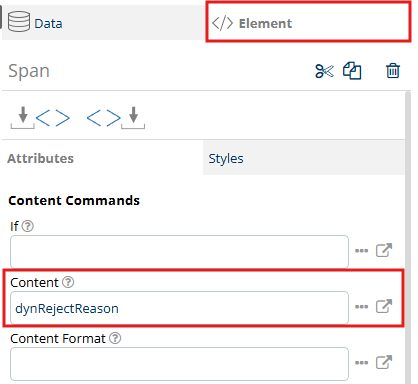
On the right-hand side of the screen, select Element.
-
Add dynRejectReason as the content of the newly created span.
-
The created placeholder will display the rejection reason which the recipient is required to enter if they decide to reject a document.