Creating a Named Credential to call Documill Leap's API
When building Salesforce Flow to use Leap via API, it will require the use of Leap External API Key. Our recommendation is to store this information in a Named Credential.
First, get the Leap External API Key of your Leap Organization: Managing External API Keys . Make sure to store the Leap External API Key in a safe place, as it will only be visible once after creation.
And then, let’s prepare a Named Credential to store it.
How to prepare Named Credential for Documill Leap API
Open your Salesforce organization.
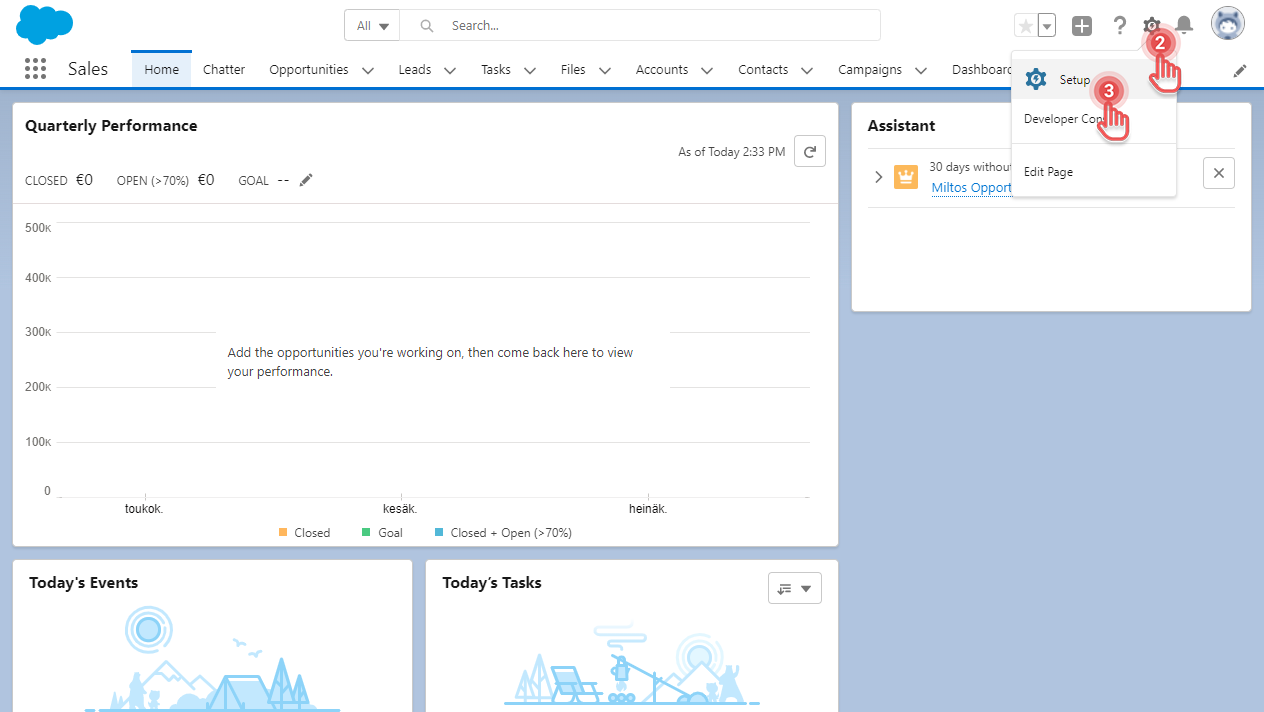
Click [⚙] button on the top right corner.
Click [Setup] option.
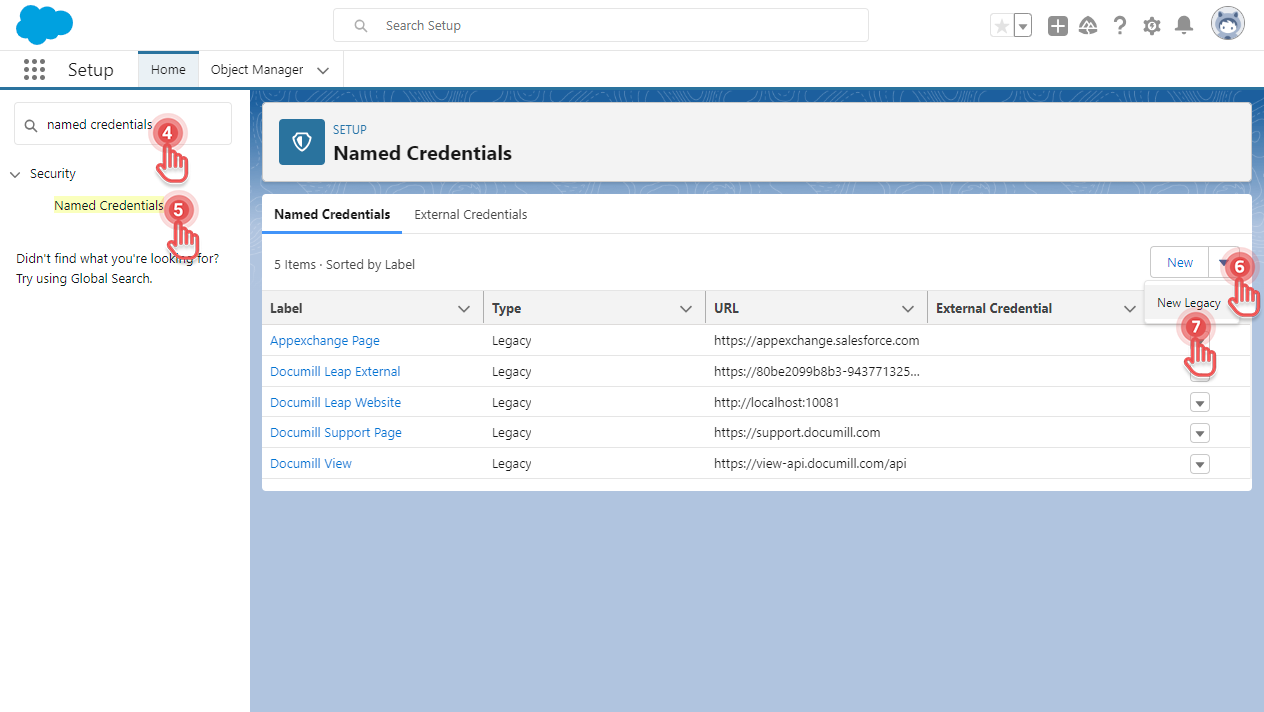
In Setup page, search for “named credentials”.
Click the Named Credentials entry.
In Named Credentials page, click [▼] button
Click [New Legacy] option.
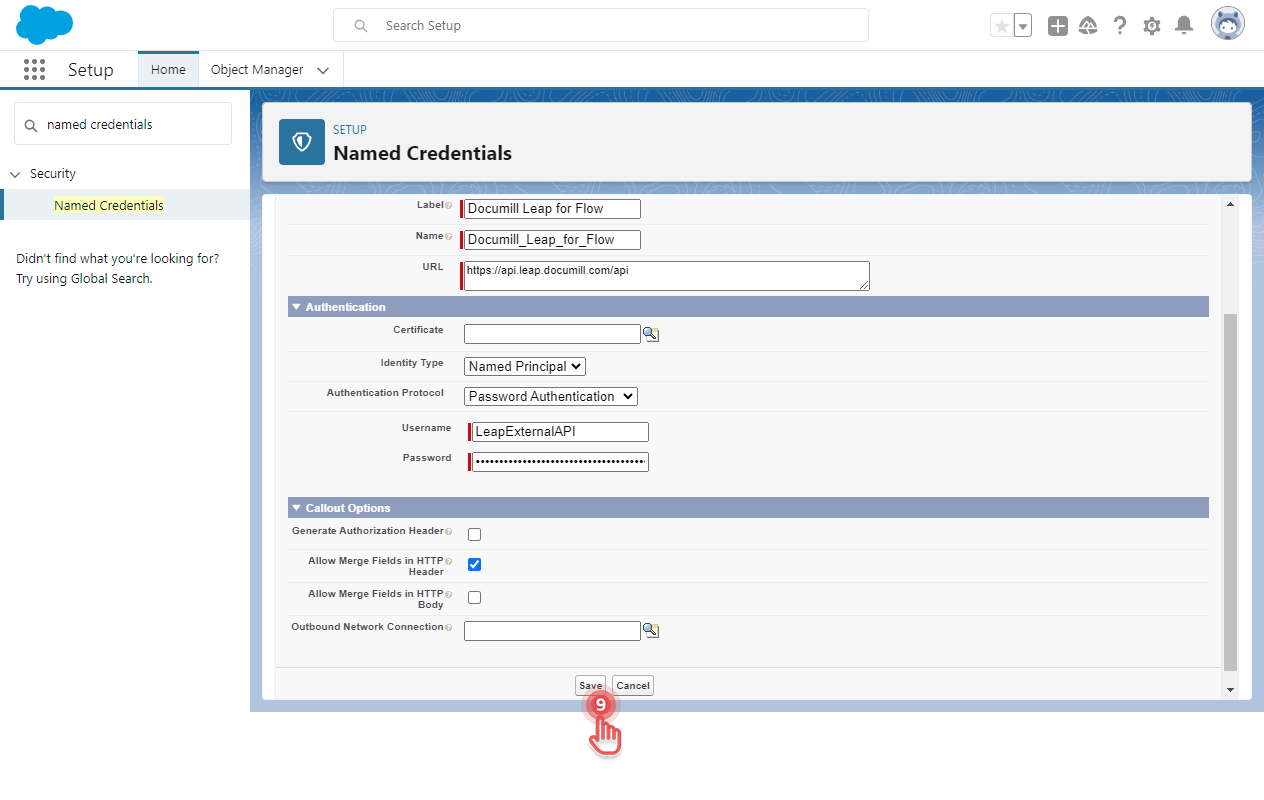
Complete the details of the new Named Credential as follow:
Fields | Values | Explanations |
|---|---|---|
Label | Documill Leap for Flow | This value can be adjusted as needed. |
Name | Documill_Leap_for_Flow | This value can be adjusted as needed. Use this value in other tutorials that involve calling Documill Leap’s API. |
URL | https://api.leap.documill.com/api | |
Identity Type | Named Principal | |
Authentication Protocol | Password Authentication | |
Username | LeapExternalAPI | |
Password | <Leap External API key> | Put the Leap External API Key in this field. |
Generate Authorization Header | OFF | |
Allow Merge Fields in HTTP Header | ON |
Click [Save] button.
Using the Named Credential
Now that the Leap External API Key is stored safely in a Named Credential, it can be used in Apex code. For example, when calling Leap External API to create a new Project:
...
HttpRequest request = new HttpRequest();

request.setEndpoint('callout:Documill_Leap_for_Flow/v1/external/projects/new');
request.setMethod('POST');
request.setHeader('Authorization', '{!$Credential.Password}');
request.setHeader('Accept', 'application/json');
request.setHeader('Content-Type', 'application/json');
...