Styling the default table
The default format for a table are:
-
Overall: the spacing between table with other elements before and after it is 0.5em
-
Header: dark background color, border line has the same color with the background, white and bold text
-
Body: white background color, dark text, inner border to separate cells

You can edit the default format by customizing the style in Table Header Cell or Table Cell
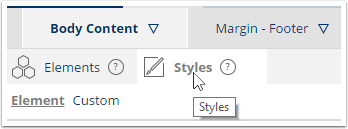
Select Styles tab in the left pane
In the list, select Table Header Cell or Table Cell

-
To format the texts, customize the Text & Font section
-
To format the borders, customize the Border section
-
To change the background color, customize the Background section
Notes:
Changing the style of the default table means that every table in the template will be changed, unless the table carries any custom styles.
Hiding table border
You can hide the border table occasionally without removing the border from the default style, by applying a custom style into a specific table.
-
Click to the table you want to hide the border. Select the Table element on the breadcrumbs
-
On the right pane, click Styles
-
Click +Add
-
Select Borders none
Hiding table border is often used to create column structure for the document.

Adding footer row
You can add custom style to the cells in the last row(s) of the table in order to make it footer cell or footer row.
Adding Footer for a normal table
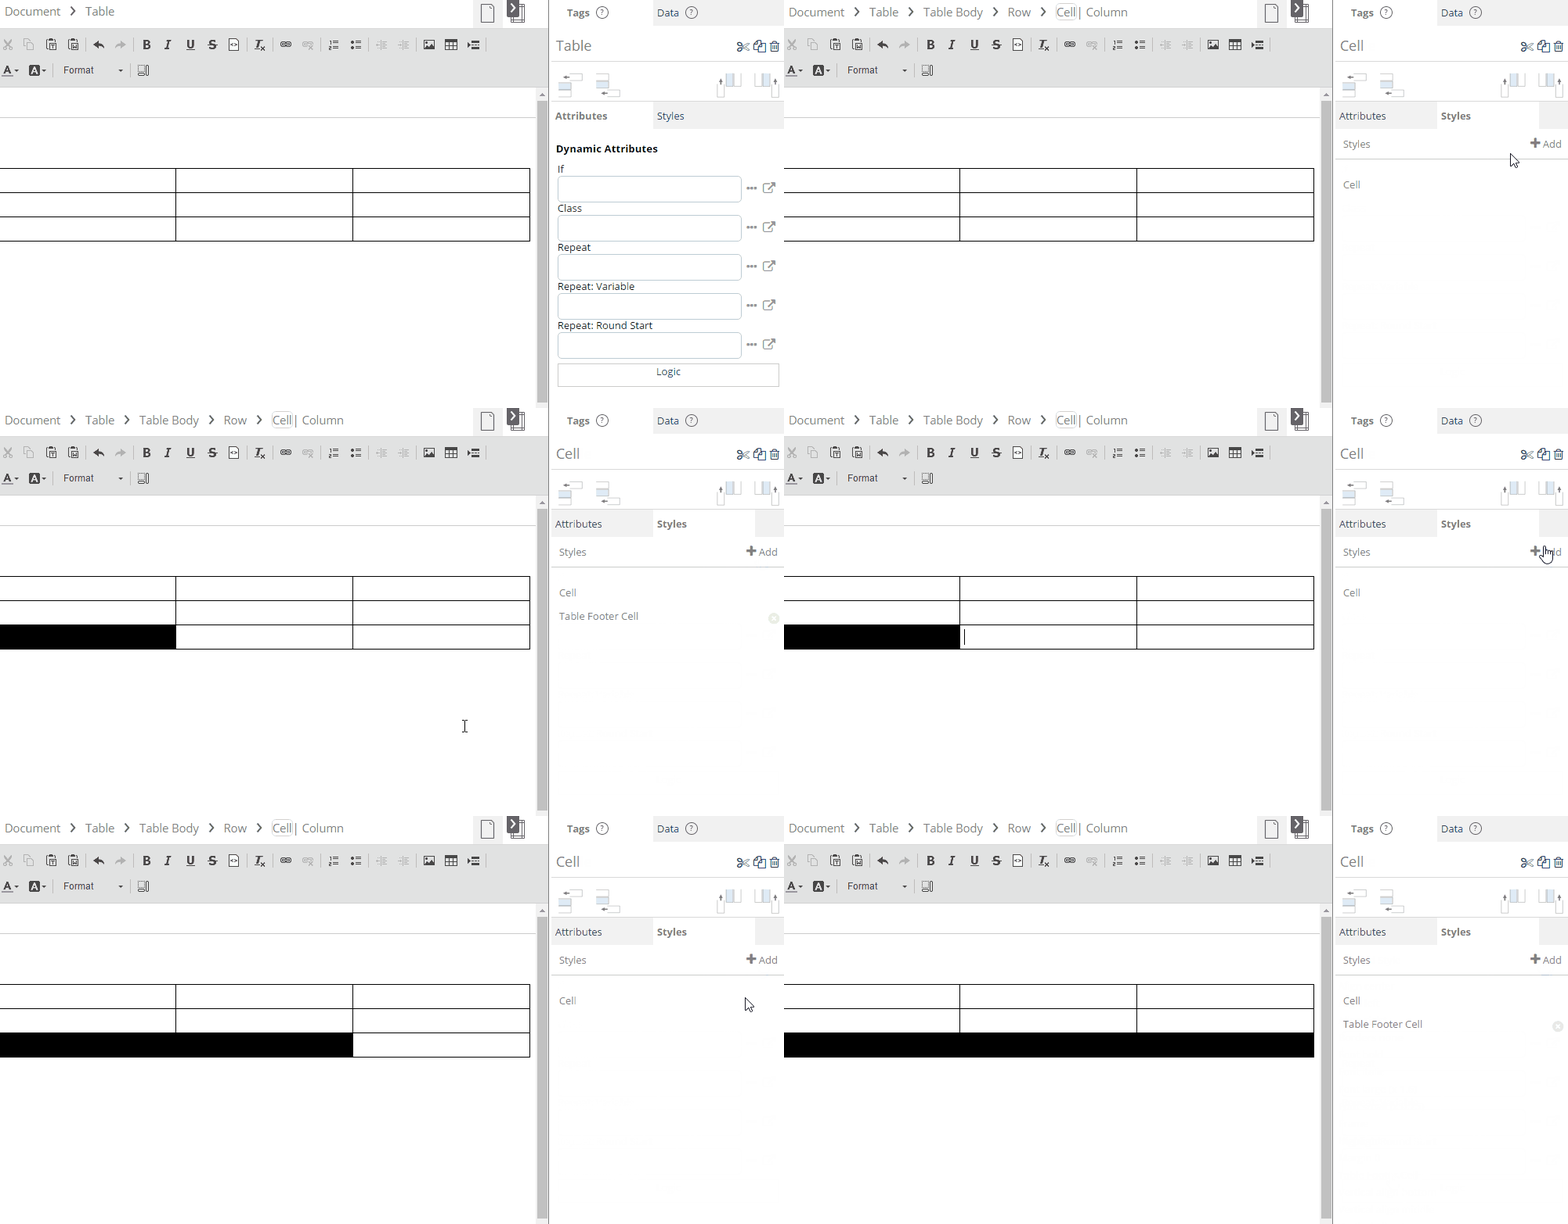
Click to a cell in the last row
In the right pane, select Styles, click +Add
Select Table Footer Cell in the list. The cell format will change
Repeat the steps with other cells in the same row
.gif?cb=01be8355cbc5142930de4fd92a968b18)
Format the Table Footer Cell style
By default, the Table Footer Cell has dark background color and white bold text. To edit the default format of the Table Footer Cell, you can:
Select Styles tab in the left pane
In the list, select Table Footer Cell
Edit the properties of the style
Creating a striped-table
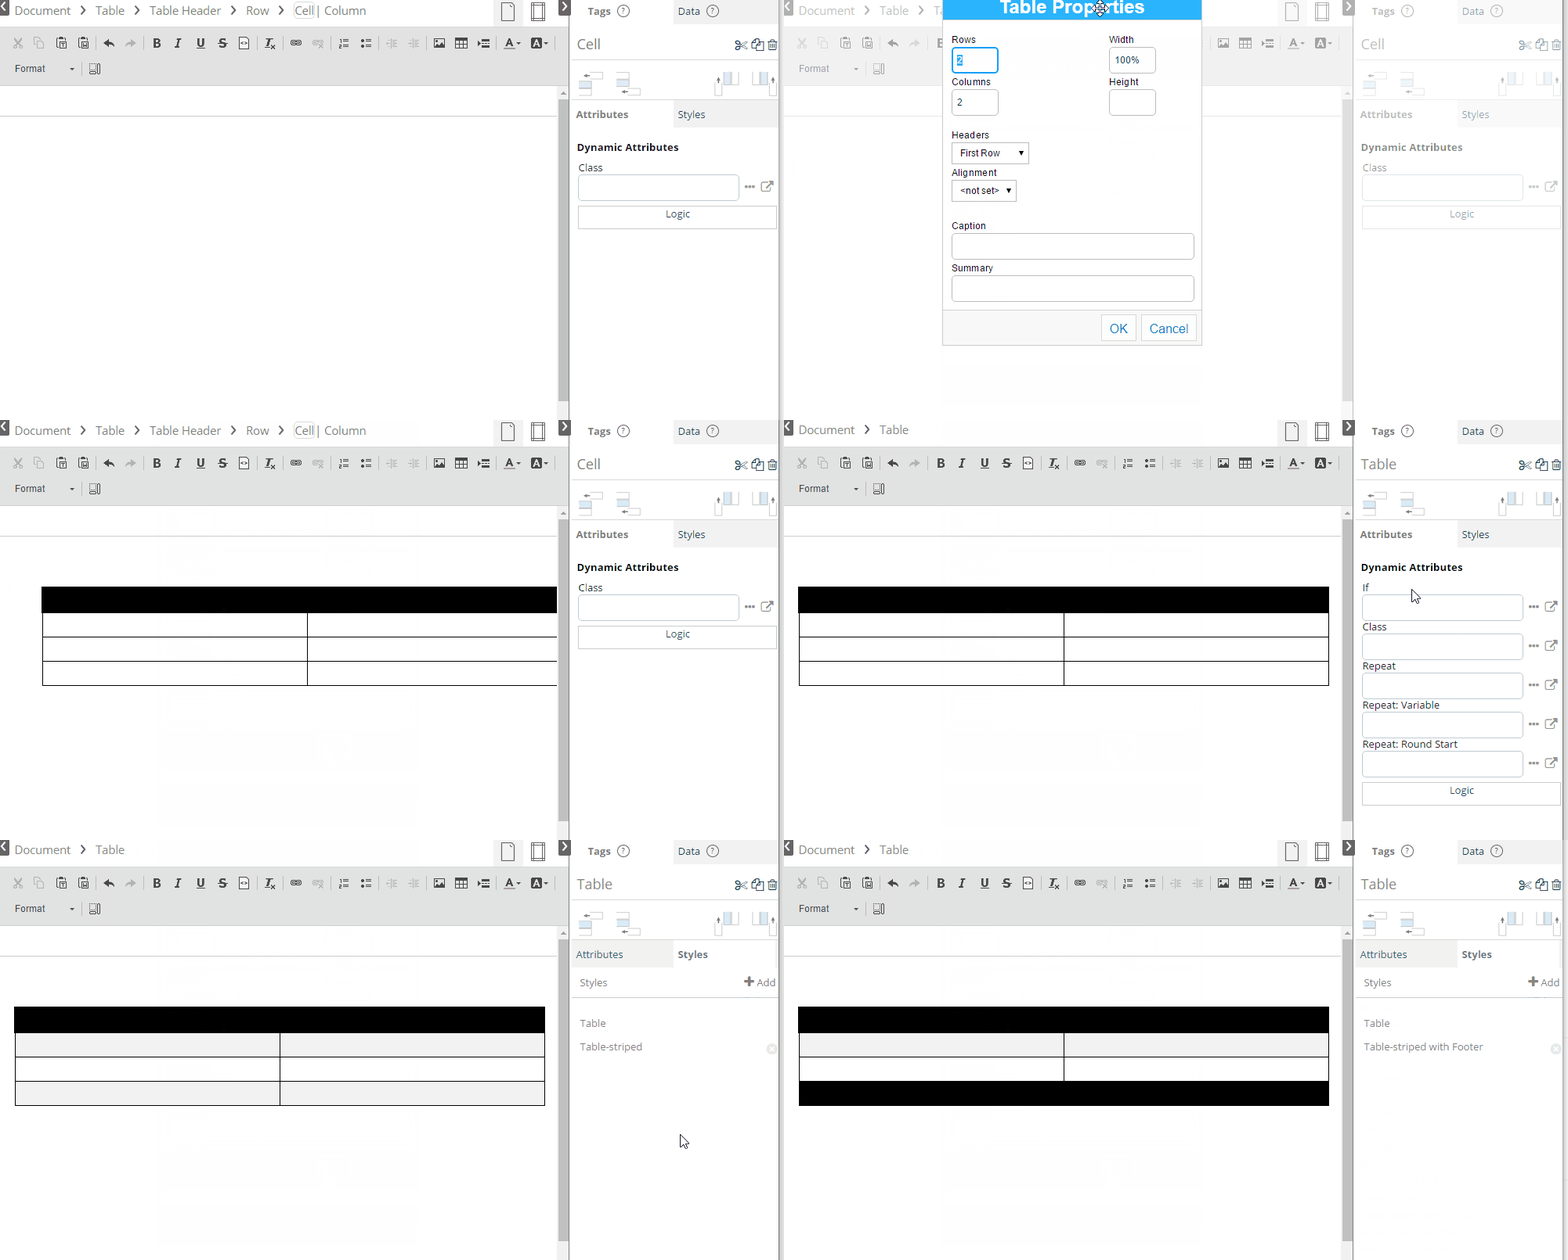
To create a striped table, first insert a table to the template
Click to the table, select the Table element on the breadcrumbs
On the right pane, select Styles, click +Add
In the style list, select Table-striped
-
If you want the last row of the table differently than the table body, select Table-striped with Footer so you don't have to add footer row manually

