There are 2 ways to insert images to the document. In this article, we will show how to:
-
Insert image with a public URL
-
Use Salesforce to host public URL images
-
Upload image from local files
-
Format image (size, alignment)
1. Insert image with a public URL
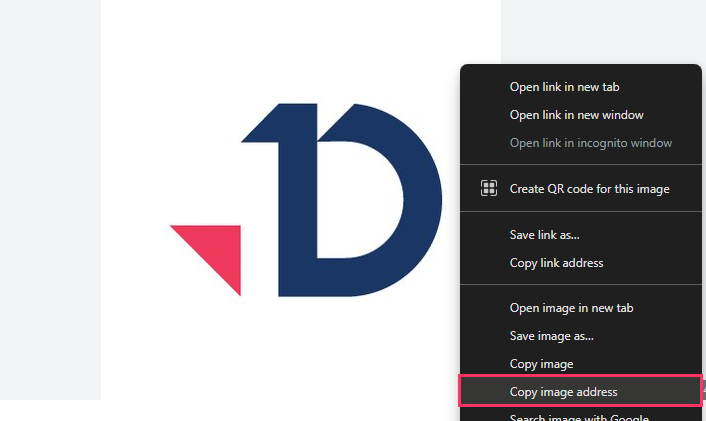
Open the picture of your choice in an incognito browser tab, this way you make sure it is publicly available.
Right-click on the image and select ‘Copy image address‘
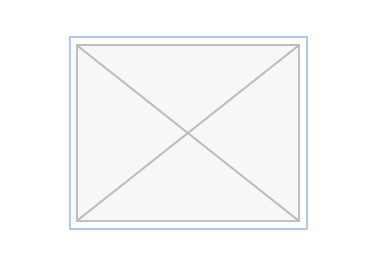
In the template, point at the position you want to have images, click to the image icon in the editing toolbar

An image placeholder will be created in the template
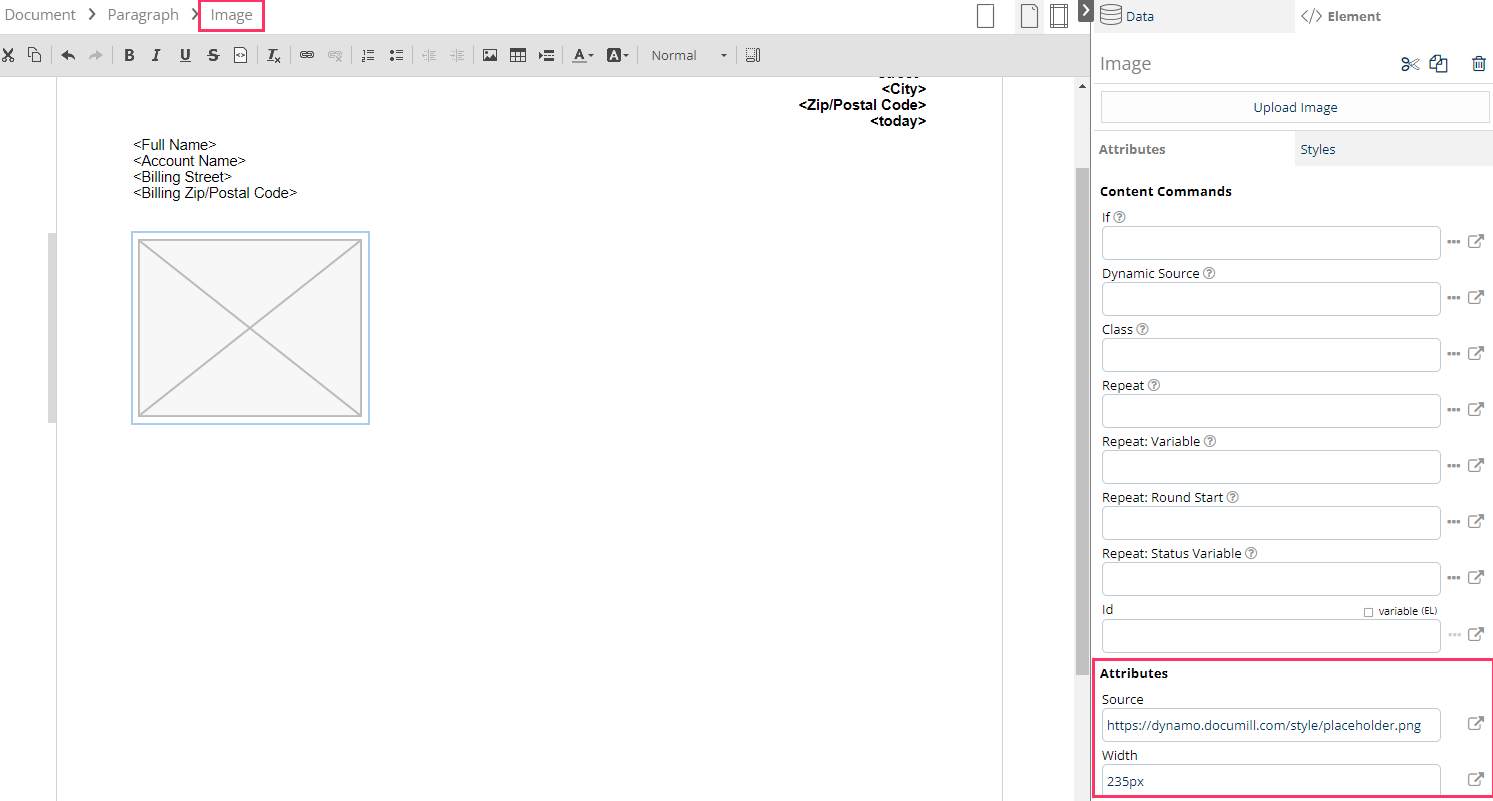
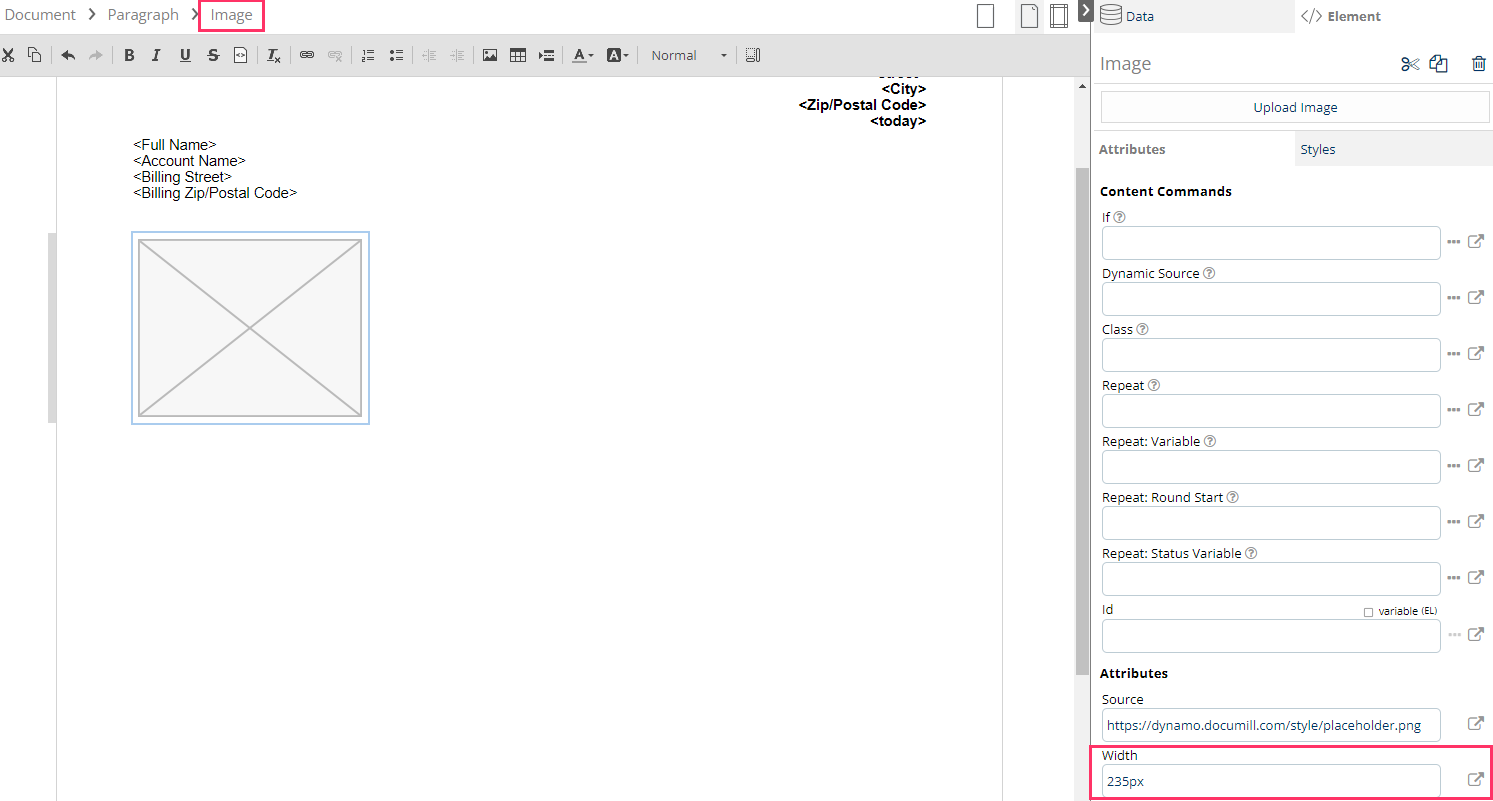
Click on the image placeholder, then on the right pane, click on Element. This is where you can change image size, insert public image URL and change more advanced attributes.
In the Attributes section, under 'Source', you can insert the public image URL you copied earlier.
Public link means that the image is published online and accessible without any log-in details required. Public link sharing is a content sharing feature of Salesforce. This feature needs to be enabled in Salesforce setup > Content Deliveries and Public Links. Instruction to enable this feature can be found here.
2. Use Salesforce to host public URL images
Salesforce can be used to host public images which can be inserted to a template. Here are the steps to upload an image to Salesforce, get the public link and use Template Builder to add that image to the template. This article focuses on the Salesforce Lightning UI.
In Salesforce, navigate to Files and click Upload Files button on top of the file list.
Select the image(s) you want to upload and click Open.
Once the upload is completed, click Done. The Files view refreshes, and you can see the latest file(s) as the first in the list.
Click on an image file to open the file preview.

On top of the preview screen there's a Public Link button which opens the Public Link Sharing dialog.
Note: If Image is in Library, user's library permission should have "Deliver Content" enabled.
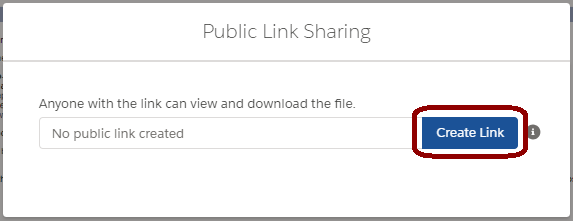
As the instruction reads by clicking the Create Link button, the image will be publicly shared.
Now image is available through Template Builder UI. Go to Data tab and select Salesforce and from there click Images. All public images will be listed. Click image name to see image preview and to add img tag to the template using drag and drop. Img tag's Dynamic Source attribute will now automatically point to the Salesforce hosted image.
NOTE: In case of uploading a new version to an existing image, it's necessary to obtain the image link again.
Select img tag and then select Dynamic Source attribute and click ... button. Select Salesforce and Images, then select image name and click Set Attribute.
3. Upload image from local files
Images can be embedded to the template by uploading local image files. It's recommended to upload only small images (max size is 20 KB). Large images should be uploaded to Salesforce (see previous section).
An image placeholder will be created in the template
Click the image placeholder. On the right pane, under Element tab, select Upload image
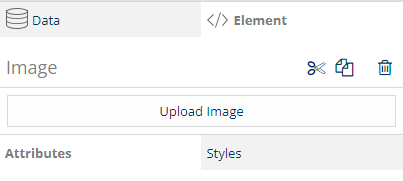
Click Choose File
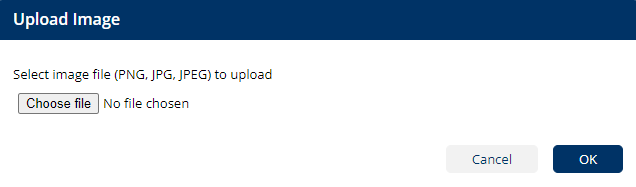
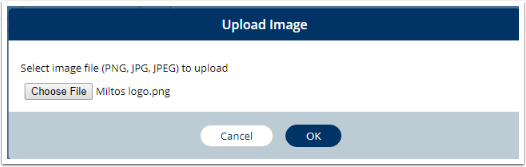
Browse and select the image file from your computer
Click OK
The maximum size of images uploaded from the device is 20 kilobytes.
4. Format image (size, alignment)
-
Resize image
In Dynamo, image size can be scaled up and down by changing the width of the image.
To resize the image, click on the image placeholder, then on the right pane, click on Element tab. In the Attributes section, the Width attribute can be found by strolling down to near the end of the attribute list.
-
Alignment
You can align the image left, right or center by adding the relevant style to the Styles section under Element tab on the right pane.
Follow the following steps to add alignment to your image:
-
Click on the image placeholder
-
On the document element breadcrumb, choose the element 'Paragraph'
-
On the right pane, select Tag tab > Styles
-
In the Styles mini tab, click on the +Add button and add relevant alignment style to the image
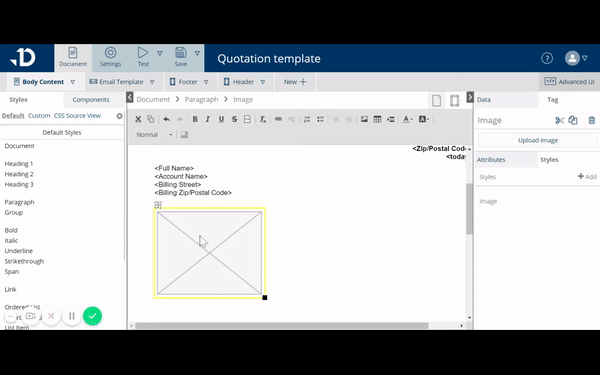
Image is a child element of paragraph <p>, therefore alignment style should be added to the parent element paragraph.