1. Create a Documill Template
The first step is creating a new template using the Template Builder. Within the template builder, click on New Template and select the Blank template.

Proceed to select your main object. The main object represent the starting point of your template, this is typically the object from where the process will begin. Besides the main object, any other object data can be added to the template later on.

From the Settings tab, navigate to the Workflow section and enable the Data collect external workflow.

Once enabled, the Data Collection settings will become available.
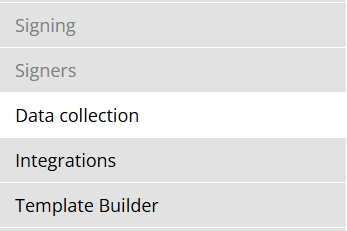
In the settings, most aspects of the workflow can be easily defined. Consult the settings page for detailed information regarding each setting.

2. Add Form Elements
After the settings have been configured as needed, the content of the document can be created. Click on the Document tab and begin creating the document by adding content, formats and styles.
In order for the recipient to enter information, Form elements need to be added to the document. Form elements can be found in the Components section on the left-hand side of the screen.
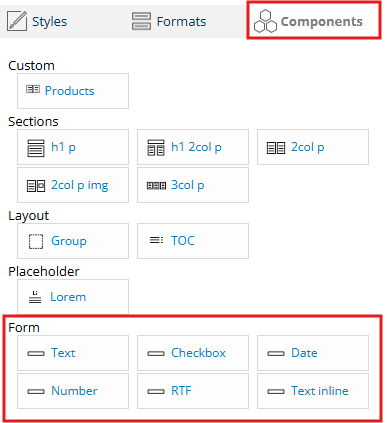
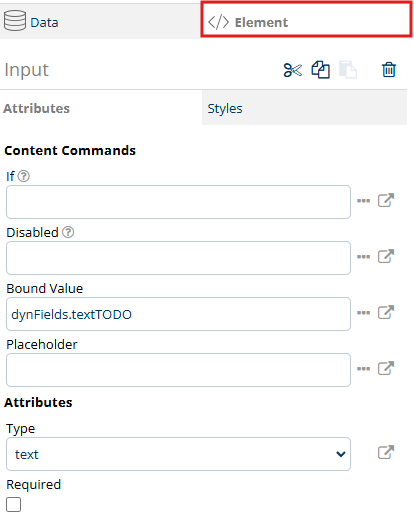
Once added to the document, the Forms can be customized further by clicking on the desired Form and accessing the Element tab on the right-hand side of the screen.
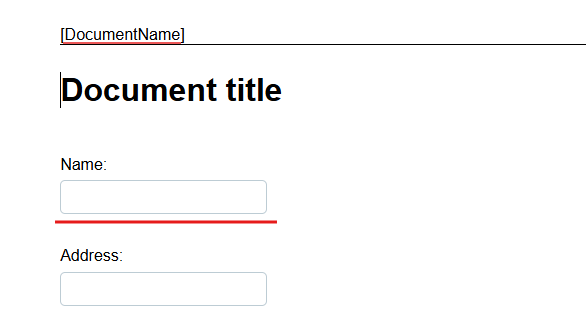
The following names cannot be used for bound values as they are reserved by the system:
abstract, continue, for, new, switch, assert, default, goto, package, synchronized, boolean, do, if, private, this,break, double, implements, protected, throw,byte, else, import, public, throws, case, enum, instanceof, return, transient, catch, extends, int, short, try, char, final, interface, static, void, class, finally, long, strictfp, volatile, const, float, native, super, while
For each Form added to the document, various settings and conditionality can be set. A value that must be configured for each Form is the Bound Value. The bound value will be the variable name which will store the user input from your recipient, this is especially important when saving the data back to Salesforce.
Besides various attributes being configurable, Forms can also be styled as needed. Consult this article to learn more about document styling.
3. Save the Data Back to Salesforce
To ensure that data saved back to Salesforce after the document has been submitted, follow these steps to configure the workflow and add the necessary functions.
-
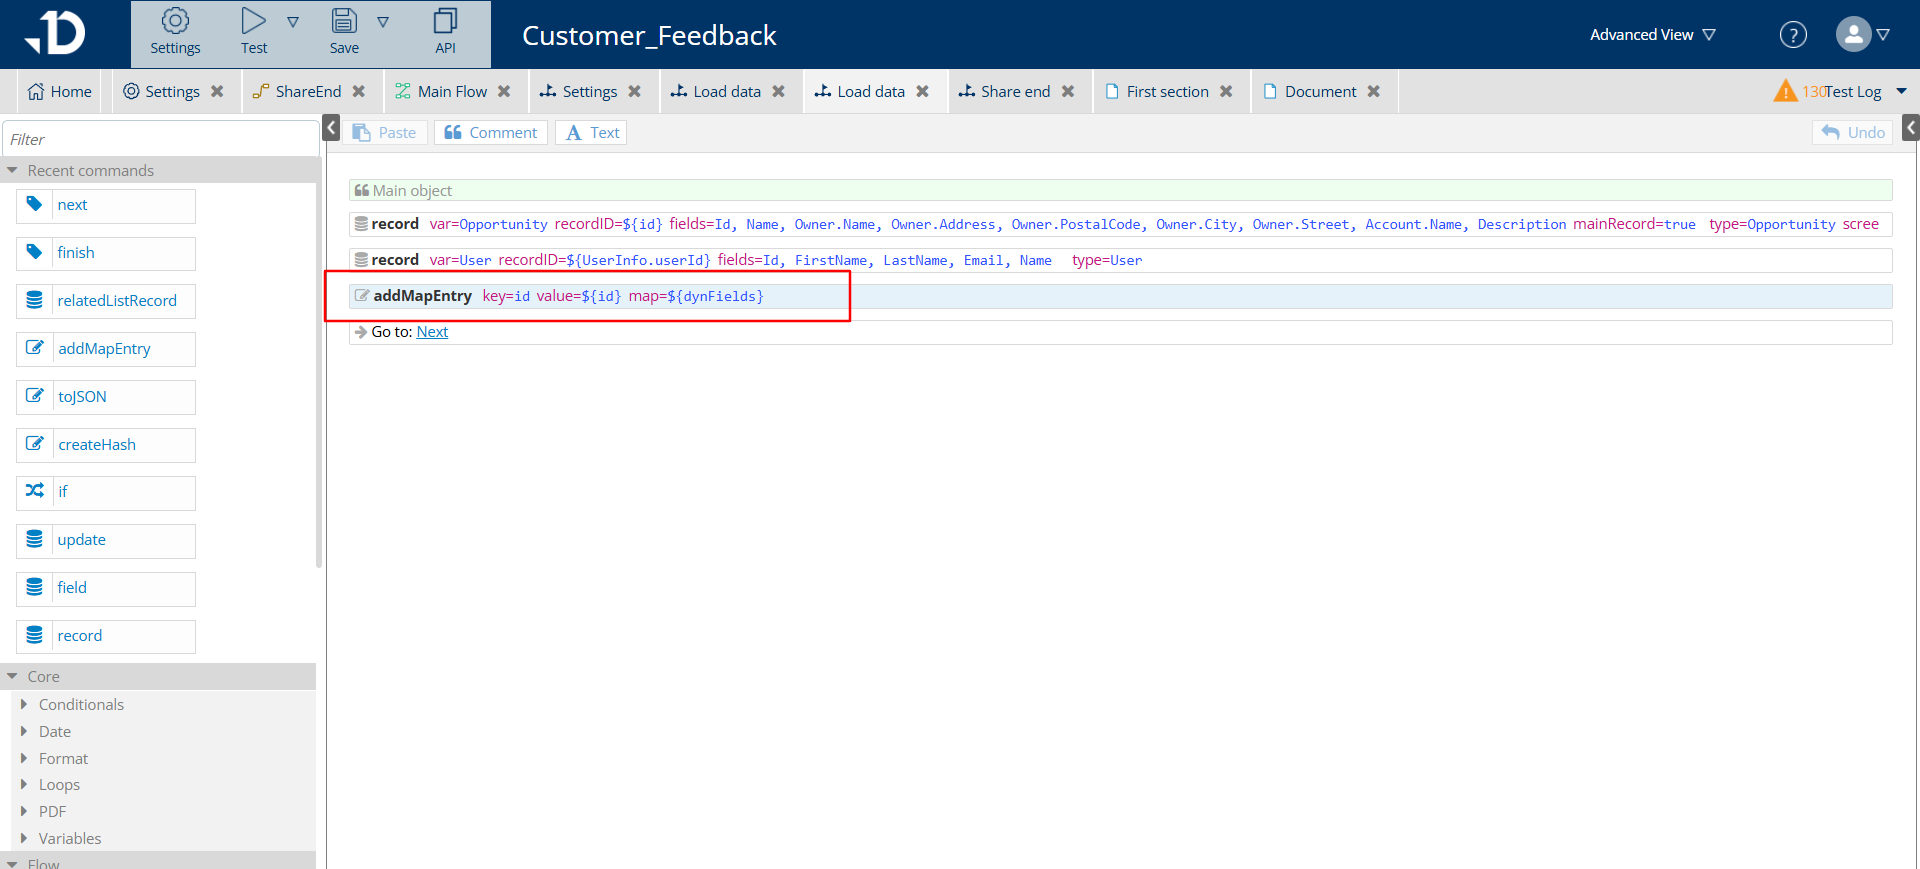
Access the main flow, select step ´Custom Data´ then edit ´Load Data´ and use addMapEntry command to map dynamic field values to specific identifiers.
-
From the Home tab, access the ShareEnd subflows and select step ‘Share end’.

-
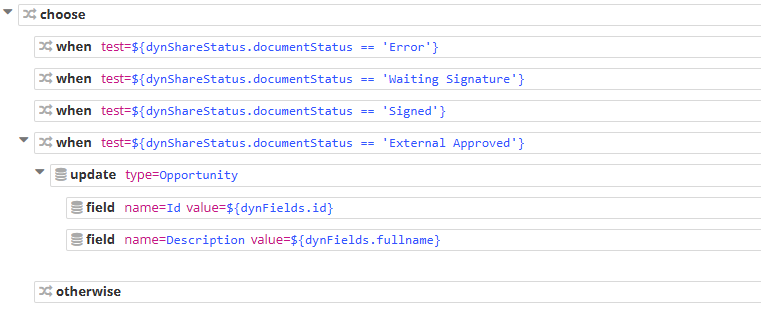
Find the correct When command. For Data Collect workflows, the document status External Approved should be used.
-
Choose update command. In the
typebox, enter the API Name of the Salesforce object you want to update (e.g., Opportunity or Account). -
Add child field commands. The first field command should contain the record ID of the Salesforce record to update. Add subsequent field commands for each field you intend to update, where
nameshould contain the API Name of the target field in Salesforce andvalueis the configured input form value. For example,dynFields.fullname. There can be as many field commands as needed.
After clicking the Exit button post-document generation, the user's input updates the Description in Salesforce, enabling seamless real-time data transfer.

