Adding a content element in template design refers to incorporating a specific piece of content, such as text, images, tables to present the data and the content in correct format and fit with business needs.
Adding text
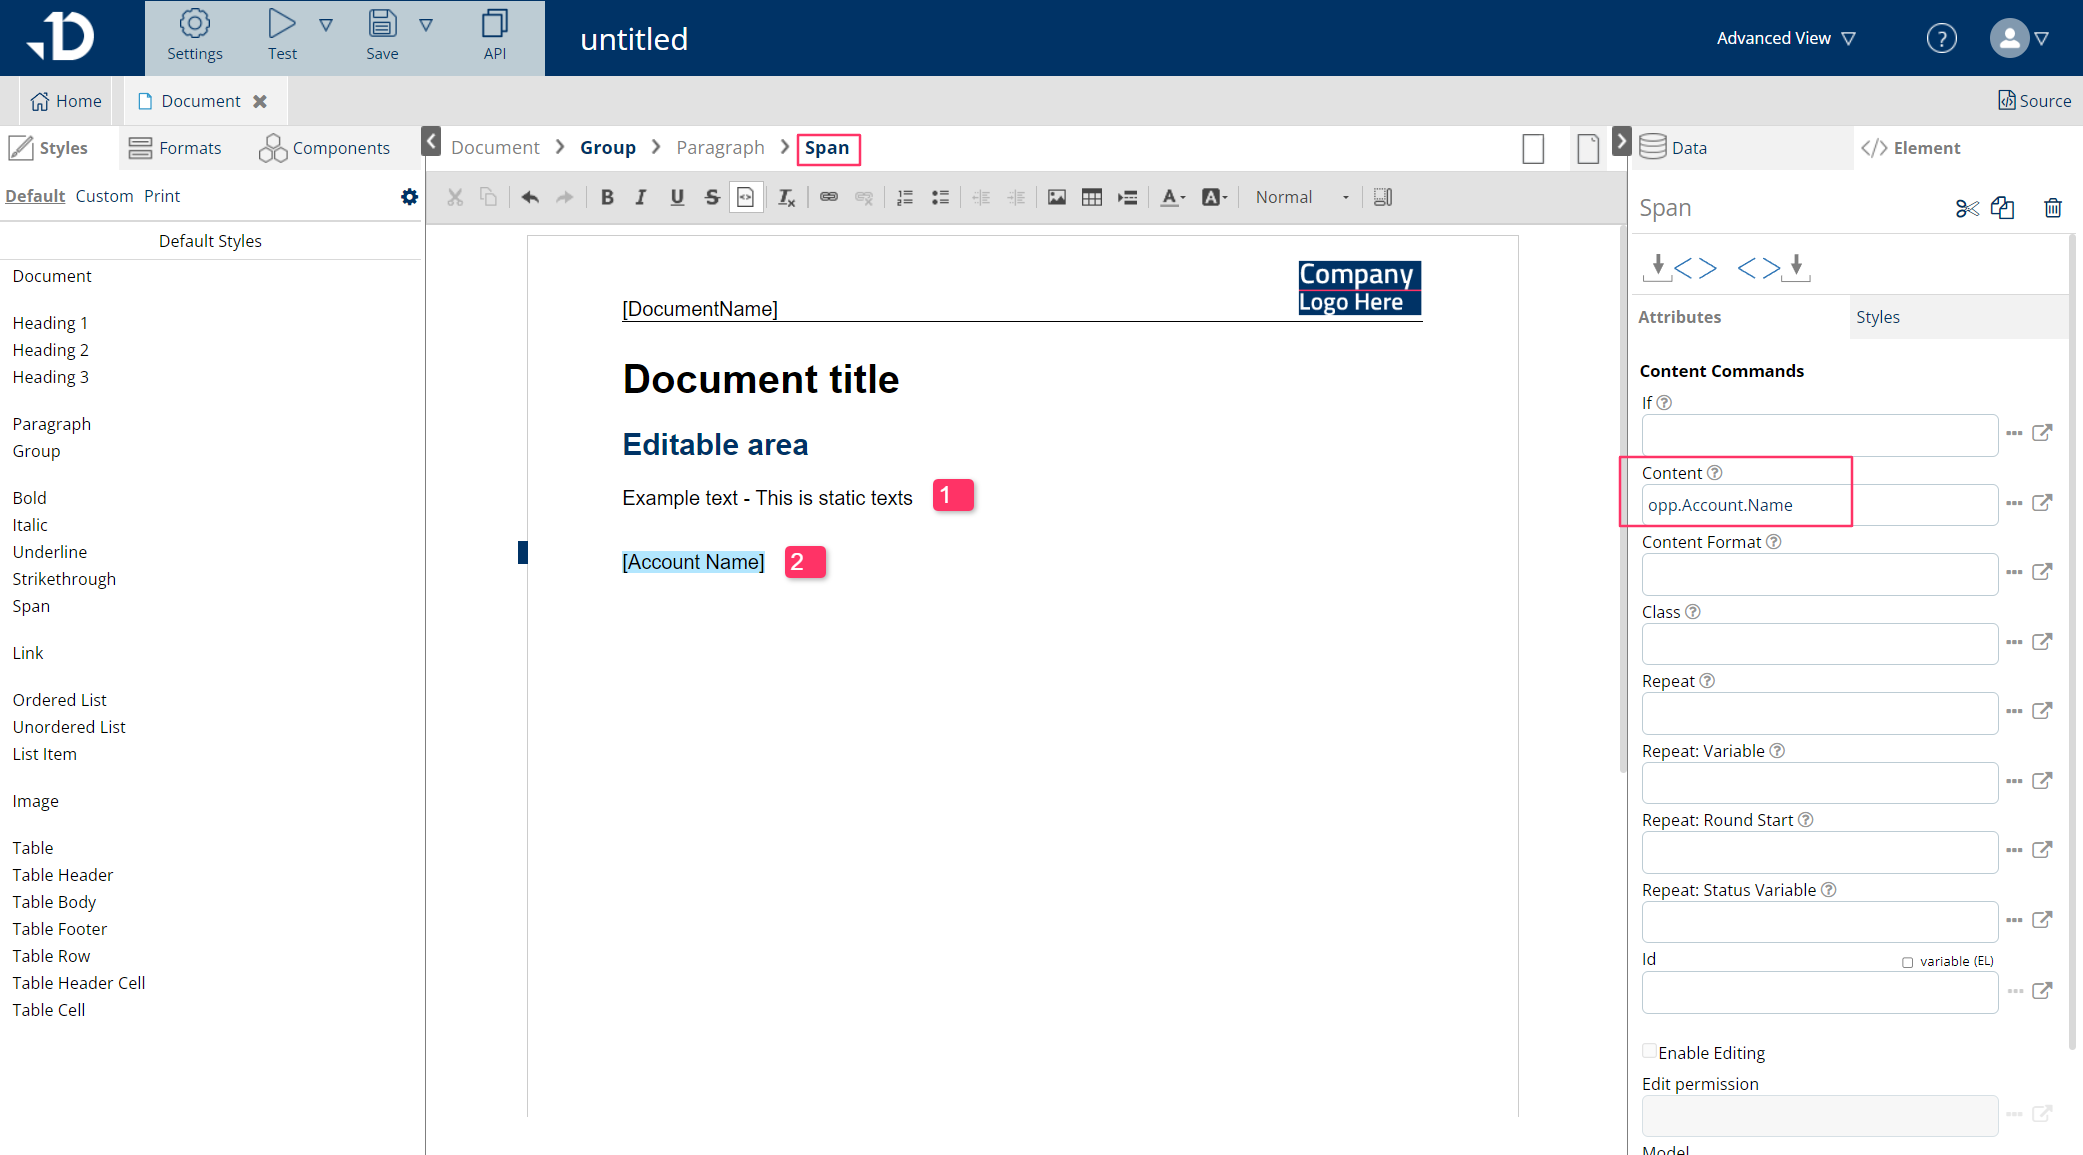
There are two types of text content:
-
Static text (1): contains no data binding and stays consistent in every generated document. The text can be entered freely to the document editor. Each line of text is a paragraph.
-
Dynamic text (2): where the content is mapped with data and the content may vary in each generated document. Usually, it is wrapped in a
<span>element which gets highlighted when hovering over it and has square brackets [] outside the text (placeholder). The dynamic content can be mapped from the Data Source tab.
Adding image placeholder
Image placeholders are added with the image icon on the editing toolbar.

After clicking on the image icon, a placeholder will be added to where the cursor is. A new element <image> is created with special attributes like Source and Width to customize the image. Images under 20KB can also be uploaded from the Upload Image button.

Depending on where the image is stored, either in Salesforce or on another publicly accessible hosting site, there are different ways to map the image.
Adding tables
Tables can be added using the Add table icon on the editing toolbar.

-
Select the place where the table should be added on the document
-
Click on the table icon to add table
-
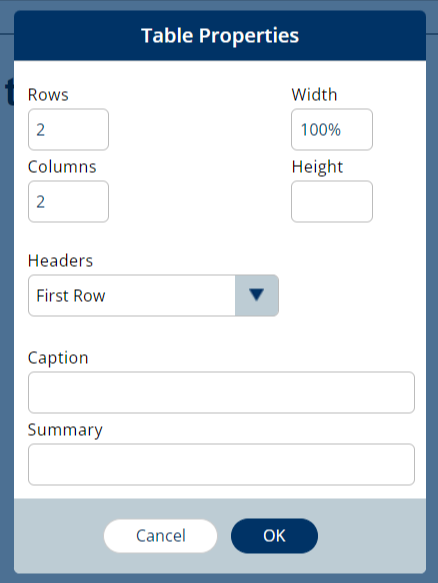
Give the number of Rows and Columns, Width or Height
-
Click OK and a table will be added (image below)

The table element <table> contains the table header <th>, table body <tb>, row <tr>, column <col> and cell <td> elements. Both dynamic or static text content can be added in cells.
More information on creating dynamic tables that display related lists: Adding Related List Table
After mapping all the needed contents, the author can move on with styling those elements to fit with the company’s branding and configuring the template flow to allow users to go through a certain document generation process. Based on business needs, there are multiple ways to customize the document workflow. The easiest way is to use Settings. For specific customized needs, there is also an advanced way to configure the flow, by using commands, steps and screens. Find out what are the next steps: