The name says it all. A Group is a way to connect all independent elements (like headings, paragraphs, tables) together by wrapping them inside a parent element Group. So you can add logic or give the conditions to all of them at once. Group element is used when:
-
You want to give end-users permission to edit the content of specified part in the document.
-
You have multiple elements those will be displayed in the document under the same logic, like conditions or Related List.
1. How to create group or editable group
In the document template, select the area that you want to group them together
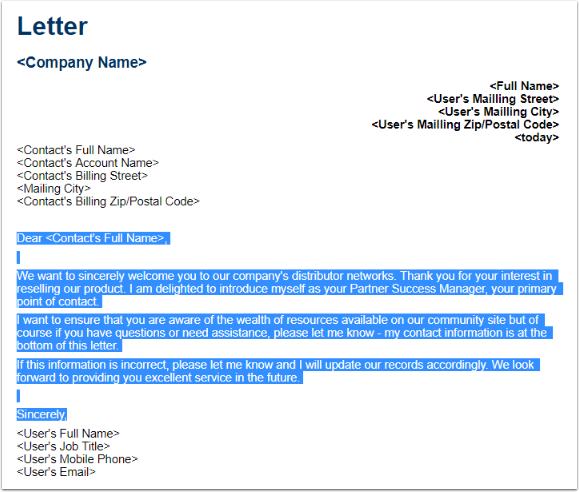
The right pane will show options for you to create a group with the current selection
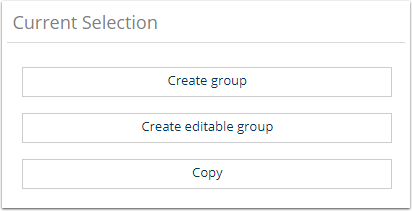
Select Create group or Create editable group
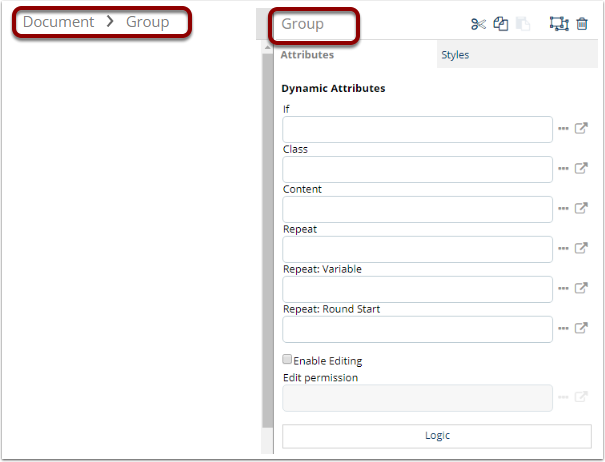
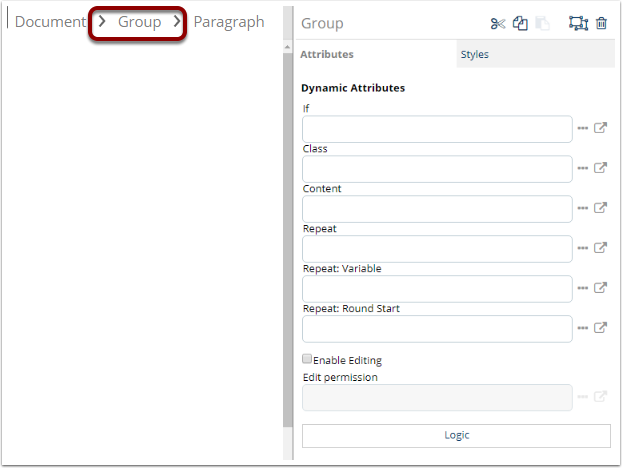
A group will be created. The right pane will open the Group element's attributes. You can also see the change in the breadcrumbs
2. Work with group
Review the Group's structure
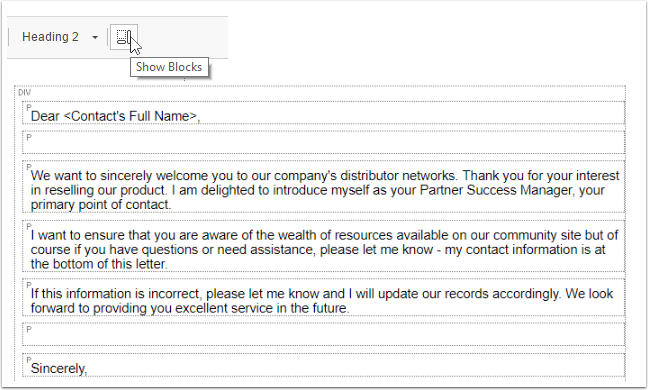
You can review the Group's structure to ensure if the elements stay inside the Group, either by checking the breadcrumbs or using the Show Blocks button.
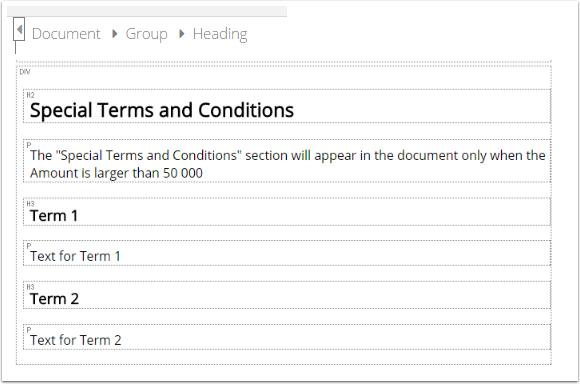
Select the Show Blocks button on the editing toolbar. The Group is represented as DIV block. All elements need to be grouped should stay inside the DIV.
Select and edit group's attributes
To select an existing group in your template, click the group. You will see in the breadcrumbs. Click the Group in the breadcrumbs to select the whole group instead of the child element, Tag tab on the right pane will open the Group's Attributes and Styles
Ungroup
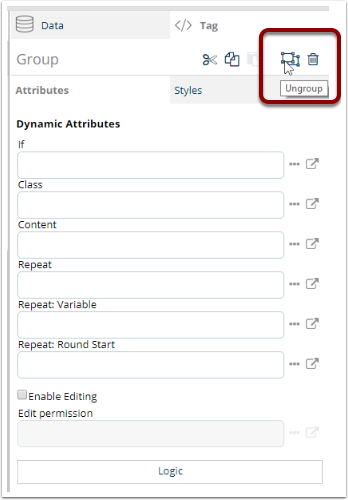
Select the group.
In the Tag pane on the right side, click Ungroup icon
Delete group
If you select whole text in the group and press the "Delete" button, it only removes the content from the group, but the group element remains. To completely remove the "group" element from the template, you can either:
-
Press the Backspace button from your keyboard while you stay inside an empty group
-
Select the "group" element from the breadcrumbs, click the Delete icon on the right pane

Insert content after Group
When you are inside a group element, click Enter will create a new paragraph in that group.
To add new content when you don't have any other element below the Group, hover your mouse to the bottom of the group, a blue line will appear, select the line to Insert a paragraph after the Group

3. Group vs Editable group
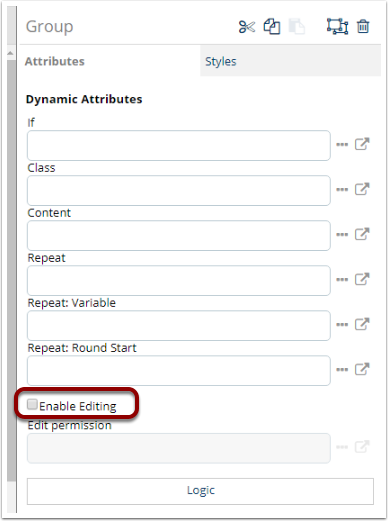
An editable group is a group in which you allow your end-users to edit the content after generating the document. The "Create editable group" button when you select elements is a shortcut to enable editing permission in the group. If you have not selected "Create editable group" when grouping elements, or wish to enable / disable editing function later, you can do that in the Group's attributes.
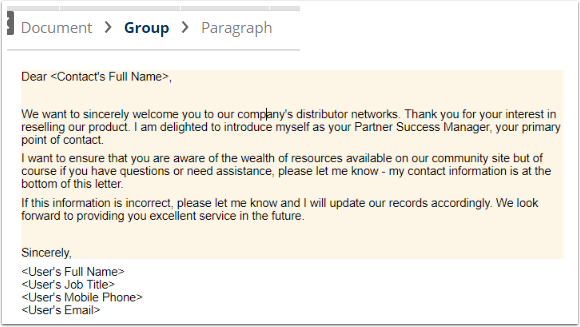
When Enable Editing is activated, the group will have a highlight background, indicating it's an editable group. The Group element in the breadcrumbs has a blue color, indicating there is some sort of logic used in this group.
Edit Permission vs If attribute
When Enable Editing is activated, you can optionally control the Edit permission, to define in which condition end-users can edit the content in the specified group. Common edit permissions are:
-
Based on their role or profile, end-users might or might not be able to edit the content in the group
-
Based on a specific field in the main record, for example: Allow editing only if "Document Status" field is "Draft"
If the attribute in the Group decides when to show or hide all content of the group in the document (Use case: Show / Hide one big content section) When the group is shown in the document, end-users can edit the content if allowed. If the group is hidden from the document, end-users are not going to do anything with this group.
4. Other use cases of "Group" element
Besides having a group for editable content, you can use the group for other purposes:
Show / Hide one big content section
When you have a section, including more than one paragraph, need to be display dynamically based on a condition, instead of adding the same condition in the Dynamic Attributes for every element, you can put all of them in a group and give the condition only to the group. Using Group allows you to maintain the template easier. In the future, when you have to change the condition, the change happens only in one place.
The example is a section consist of 3 headings and 3 paragraphs. Without Group, you need to add condition into every element. In this example, altogether is 6 times.
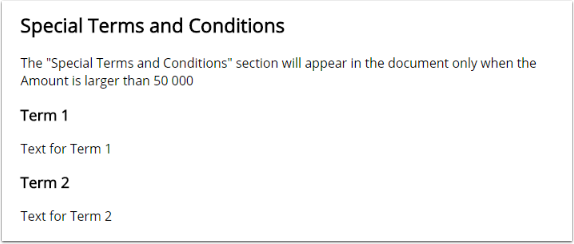
Putting them into a Group, you only add the condition for the Group. The Group is presented as DIV in the template's structure.
Learn How to add condition into template
Use for Nested Dynamic Content
Independent elements are nested in one Group will allow you to apply many conditions in the template flexibly.
See example of Nested Dynamic Content
Present a Related List with different formats
When you assign a Related List to one element, Salesforce data from the List will be displayed only in that element or its children elements. To present the information of one Related item in different formats such as a combination of heading and table in the example, you need to group the heading and the table into one group, and assign the Related List to that group.
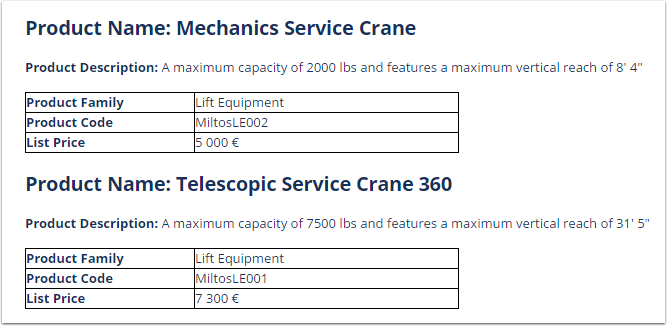
Learn How to combine multiple elements for one Related List
5. Group's limitation
There are restrictions how to select the area and create group out of the selection. The table below explains the limitation and tips to work around.
|
Limitation |
Tips |
|---|---|
|
The first and last element in the selected area must be a paragraph, heading or a span, while a table and list element can be inside the selected area. |
If you want to make only a table or a list editable, first select also paragraphs before and after the table, create a group then remove paragraphs. |
|
The selected area should cover the whole block element. The first and last points of the selected area must not be inside a table, list, group or editable area. Meaning, you can't create a group from half of a paragraph or only couple rows in a table. |
Depends on your browser and selected element, sometimesMost of the time, if you select only half content of the paragraph, you are still able to create a group. The group will cover the whole paragraph. Most of the time, you will see error "Invalid area selected" and no option to create group. |
|
You can't make a single span a group or editable group. |
If you want to end-users to edit only a phrase or a sentence in the middle of the paragraph, enable the editing in the span's attributes. See: Create span and editable span |
|
The selected area or part of selected area can not be in any other groups or editable area*
|
You can ungroup all the elements and redo the grouping. For those content inside the editable area, you can move them outside the editable area using copy & cut functions. |
6. Editing tools
When editing text in the editable fields, users can make use of the editing toolbar for text formatting and to add other elements such as bullet points. By default, the editing toolbar for editable fields contains the following editing options:
-
Bold
-
Italic
-
Underline
-
Strike-through
-
Ordered list
-
Unordered list
(Image: Default editing options)

7. Adding additional editing tools
You can enrich the editing toolbar by adding additional editing tools if needed. All additional editing tools are described below (from left to right in the image illustration):
-
font
Allows the user to change the font family and font size of selected contents. -
format
Allows the user to copy or remove formatting of selected contents. -
image
Allows the user to insert an image from the local file system. The file is uploaded into Salesforce and then linked into the document content -
indent
Allows the user to increase and decrease the indentation of selected contents. -
justify
Allows the user to define alignment (left, right, center) and justification of selected contents. -
link
Allows the user to insert a link. -
pagebreak
Allows the user to insert a page break. This break won't have much visible effect on the HTML view, but will render as a proper page break if the content is exported into a PDF. -
pastetext
Allows the user to paste content as plain text. -
showblocks
Allows the user to activate a display mode visualizing the HTML block elements of the content. -
source
Allows the user to open up a dialog displaying the content's HTML source. -
table
Allows the user to insert a table.
(Image: Additional editing options)

Advanced tip: How to add additional tools to the editing toolbar:
-
In Advanced UI > Main Flow > Step 'Initialize'.
-
Navigate down to command 'setMap var=editorSettings'
-
Add additional tools to the 'value' attribute of child command 'addMapEntry', separating them with semicolons (;)
Please see the technical documentation of this command at contenteditable.

