Skip table of contents

How to configure e-Sign in Templates

E-signatures are available via an Engage license

E-signatures can be enabled and tested by following the steps below:

Quick Setup

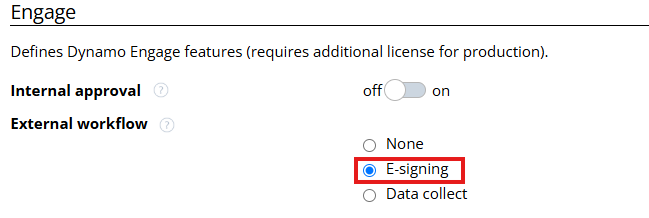
Enabling the Signing functionality:

image-20240806-105143.png

No signers have to be predefined in order to test the template. If the 'Can select signers' setting is enabled, by default, the related account contacts (supported objects: Account, Case, Contract, Opportunity, Quote) as well as the document author will be selectable.

image-20240104-104031.png

Signer selection

If custom signer preselection is required, see Signers (Engage)

End-to-end testing can be fully done within the template builder as such:

Testing

During initial testing, the following setup is recommended for efficient testing and no email spamming:

image-20240806-105429.png

Click on the dropdown arrow in the Test button, enable Debug view and select Parameters.

image-20240806-105701.png

Use the Browse button to search for a testing record. Make sure the Test parameter dynTest is set to true. If you do not see it, add it using the Add Paramte button.

The dynTest parameter determines if emails are sent out or if they are simulated within the template builder.
The eventID parameter is 'new' by default, this means a new document will be created every time when test. This can be switched to 'false' if debugging a specific document is required.

image-20240806-110002.png

After clicking on Test, click on New Document.

image-20240806-110130.png

Click Email

image-20240806-110425.png

On the left hand side of the screen, the preselected signers will be displayed with the option to edit them. Clicking on Edit will allow the user to add, remove or change the order of signers.

image-20240806-110643.png

The email can also be modified during this stage. Next, click on Send for signing.

No actual emails will be sent during testing with ‘dynTest' set as 'true’. So the following screen will show a simulation of what the recipient would see:

image-20240806-110842.png
image-20240806-111152.png

The Status Report view automatically appears, this gives a bunch of options such as Reminders, Withdraw, Document View, and PDF View depending on the template settings.
Click 'Exit' when ready.

image-20240806-111353.png

The Debug View enables command-level troubleshooting when things go wrong.

To test the Signer’s point of view:

image-20240806-111539.png

Click on Test
Click on Open share (debug)

image-20240806-111759.png

Click Sign to start the signing process.

image-20240806-111903.png

Click Sign to confirm

image-20240806-112100.png

Another simulation email screen appears, click on Continue

To proceed with testing the Signing from the second signer's point of view, you can click 'Test' and proceed with the same steps as above.

JavaScript errors detected

Please note, these errors can depend on your browser setup.

If this problem persists, please contact our support.