
-
Available for Approving Editor and Editor tasks.
-
Available for Organization User (not available to Guest).
-
Available when Clause Library feature is configured. SeeManaging Clause Library.
Clauses are pre-approved blocks of text, such as standard liability terms or payment conditions, that your organization keeps in its Clause Library. When you insert a clause instead of typing or copy-pasting the text, you:
-
Save time: you don't have to rewrite standard wording or look for it in old documents.
-
Stay consistent: every document uses the same approved wording.
-
Reduce risk: only clauses your administrators have approved and published are available.
Finding the Clauses panel
-
Open your Approving Editor or Editor task.
-
In the text editor, click [INSERT] tab.
-
Then click [Clauses] to open the Clauses panel.
Preview
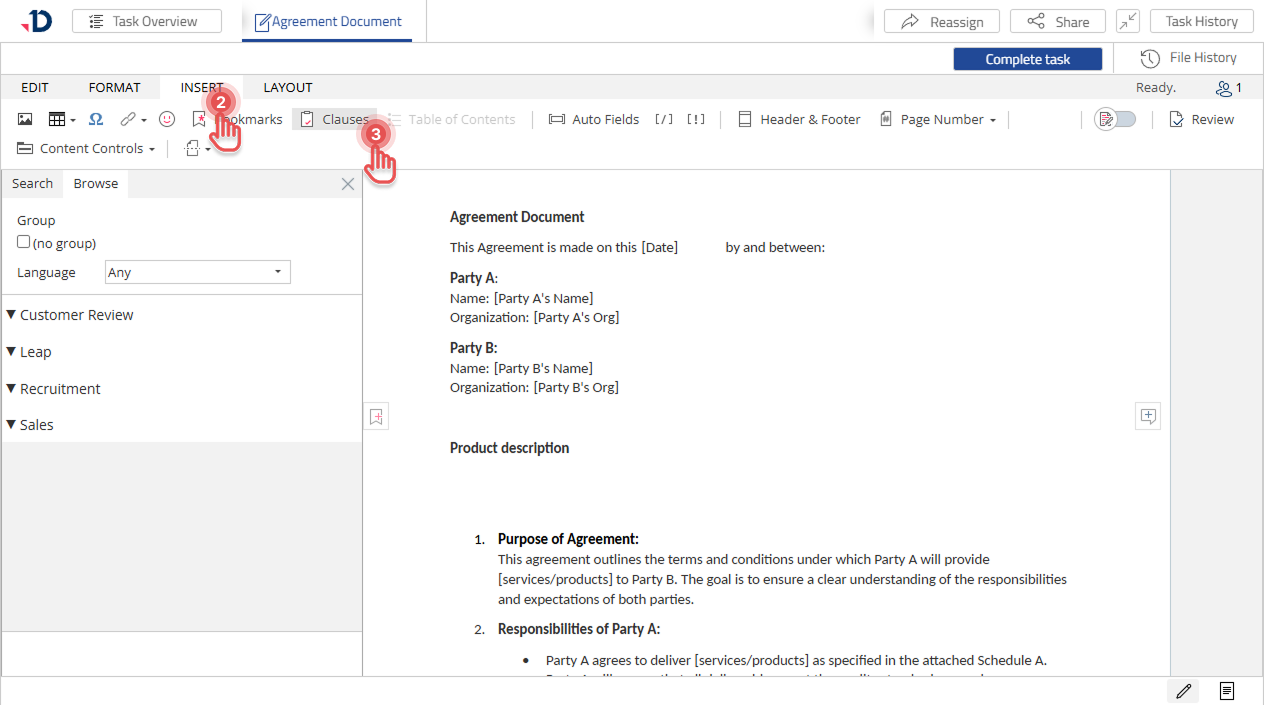
Inserting a clause into the document
-
Find the clause in the panel.
-
Drag it into the document and drop it where you want the text to appear.
Preview
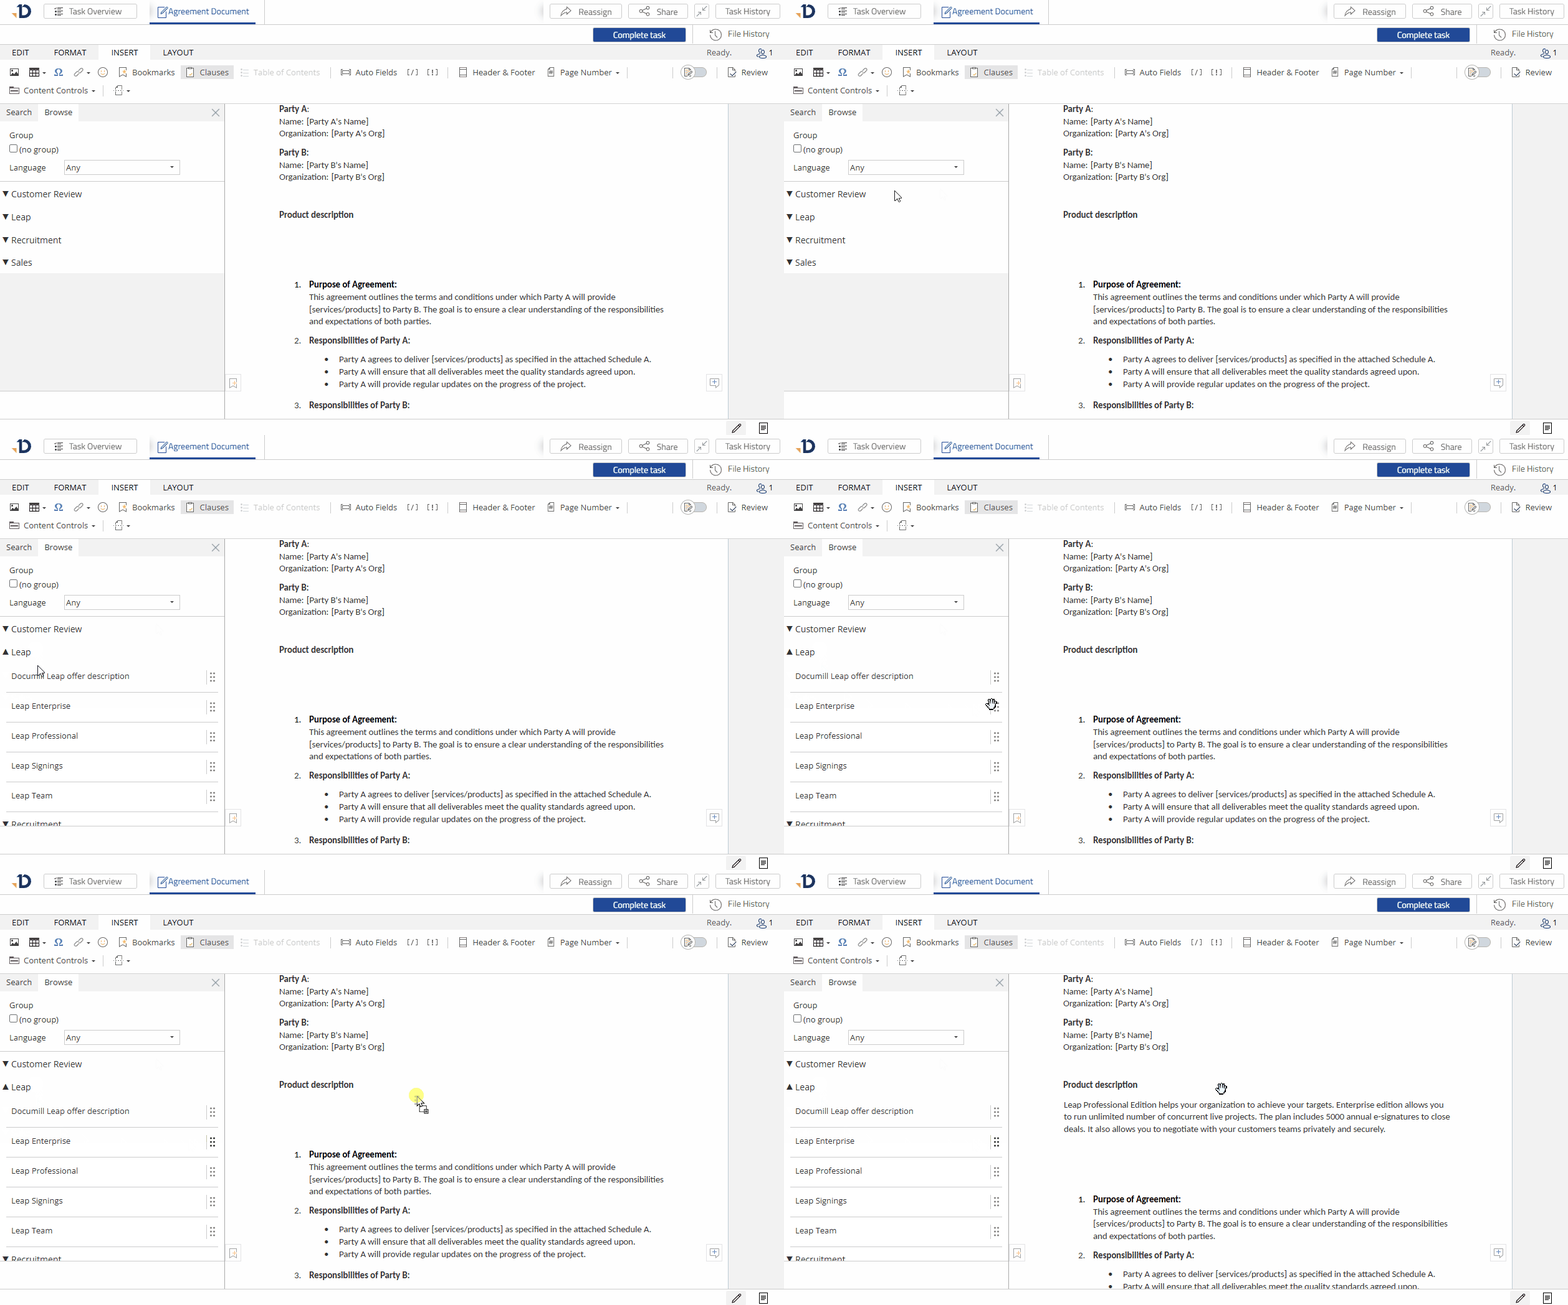
The clause goes into the document as a content control. Clause text sits inside a marked area, so you can always see where the clause begins and ends.
-
Only clauses with the Live status appear in the editor. Clauses that are Suggested, Draft or Archived are hidden.
-
If you can't find a clause you expect:
-
It may not be Live yet, or it may have been archived. Ask your clause administrator.
-
Check that the filter options match with the clause you are looking for
-