Out of the box, you can create Leap Projects under below Salesforce Objects:
-
Account
-
Contract
-
Opportunity
-
Order
-
Documill Agreement
You can also create Leap Projects under other Salesforce Objects with one criteria:
|
The Salesforce Object should contain a Field with Lookup(Account) data type. |
If you use a Salesforce Object that has Account information and would like to add the ability to prepare documents inside the Salesforce Object’s records, then you can configure a Custom Account Map. A Custom Account Map helps Documill Leap Salesforce app to get access to the Account information of your Salesforce Object.
As an example, below instructions are about adding Custom Account Map for Case object. You can replace Case with Salesforce Object you need.
Gather the required information from the Salesforce Object
First of all, you need to gather two information from the Salesforce Object:
-
Salesforce Object's API Name
-
Account Field name
To gather this information, follow below instructions:
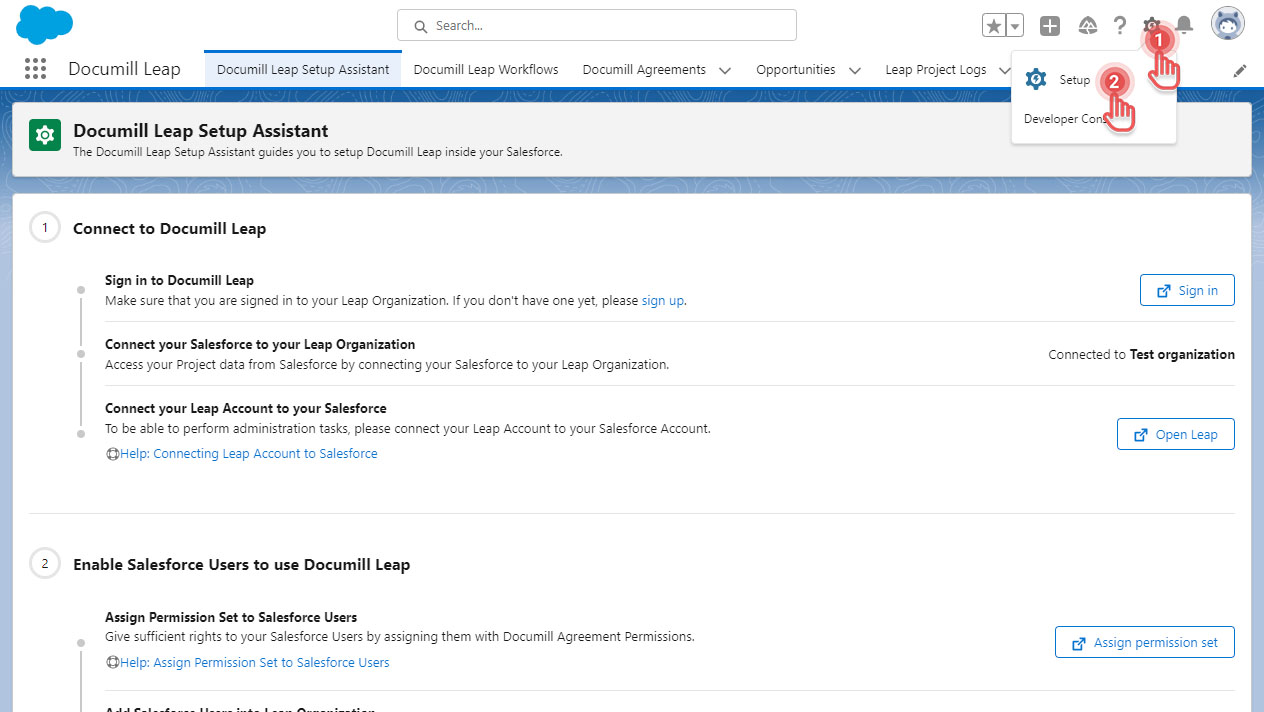
1. Click [⚙] button on the top right corner.
2. Click [Setup] option.
Preview
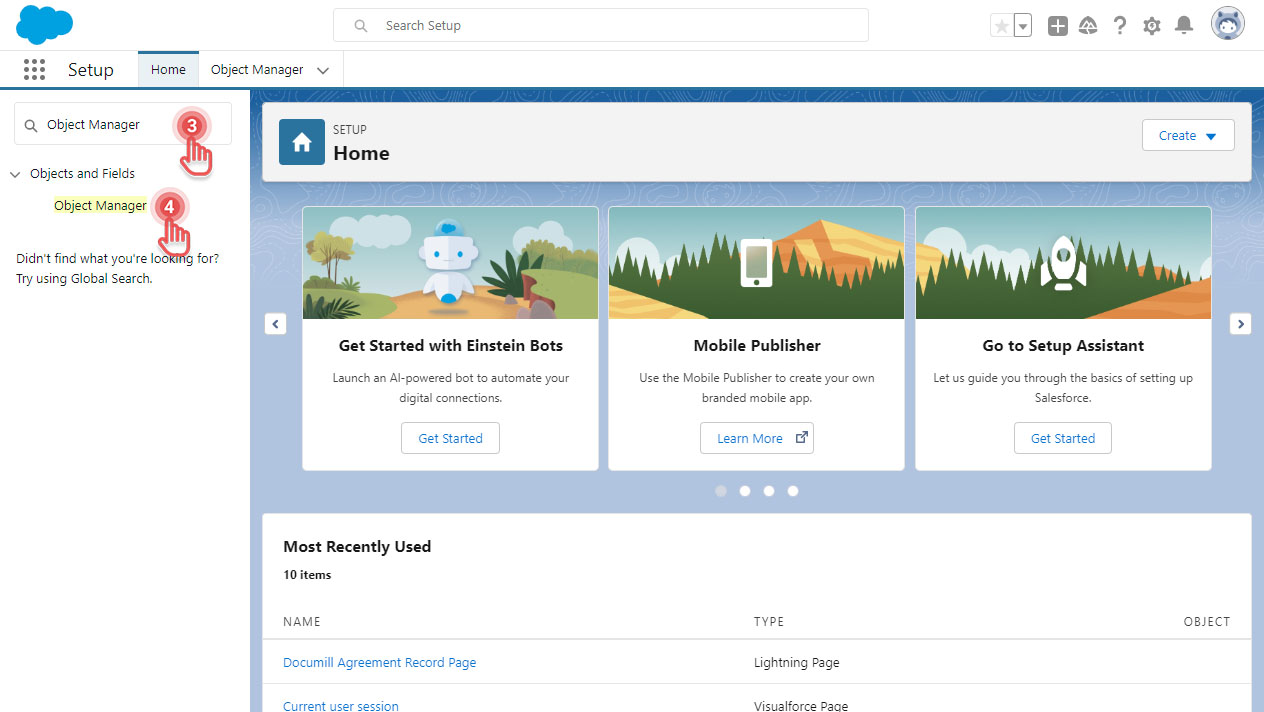
3. In Setup page, use Quick Find to search for “object manager”
4. Click [Object Manager] item.
Preview
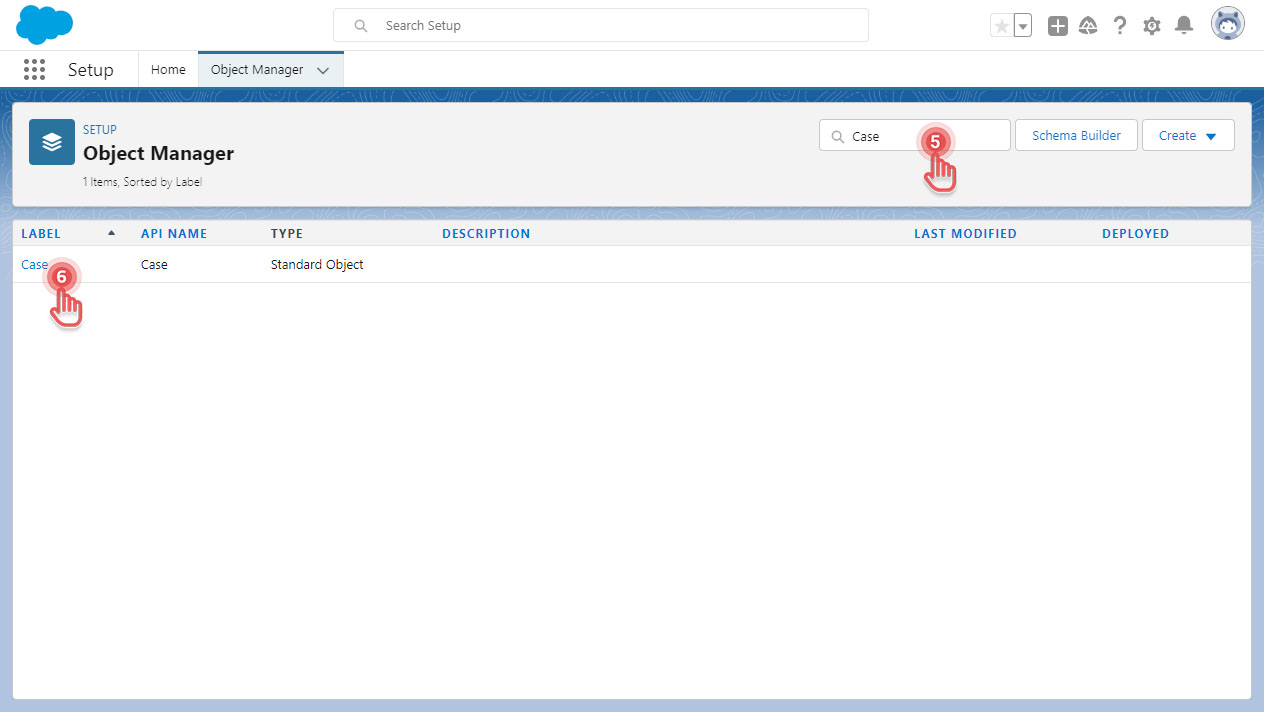
5. In Object Manager page, use Quick Find to search for “Case”.
6. Click [Case] item.
Preview
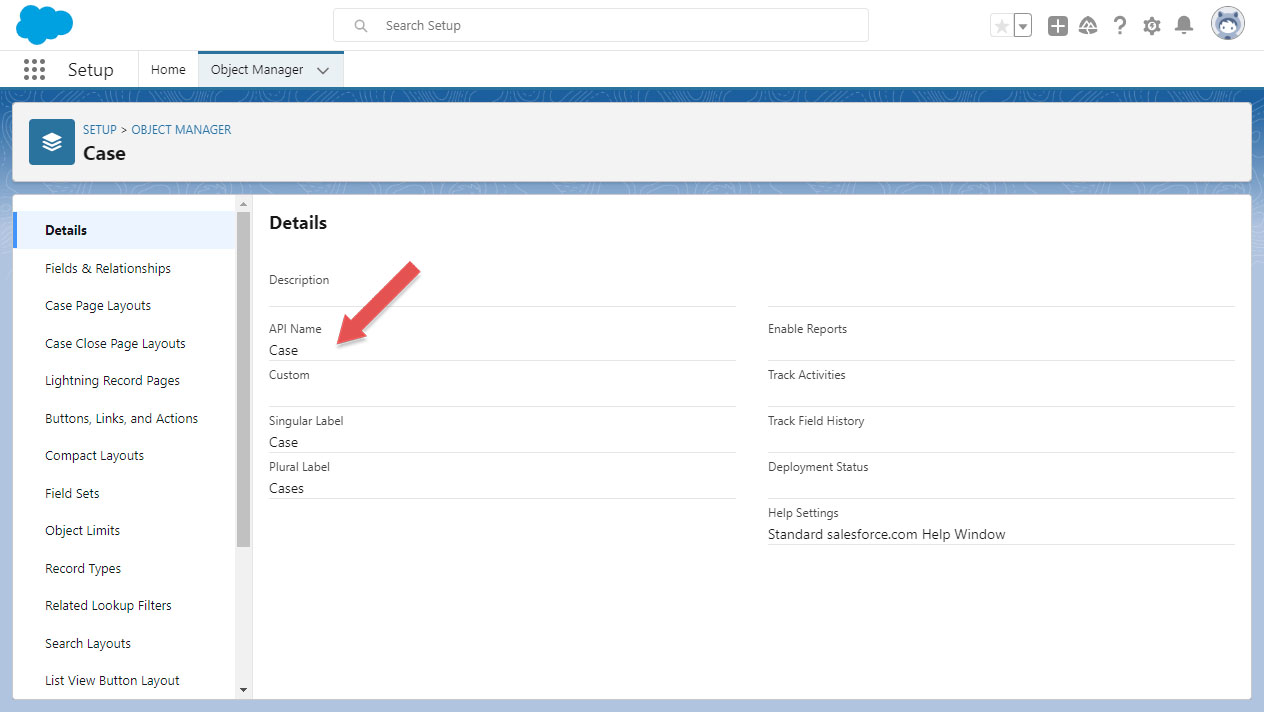
7. Take a note of the Salesforce Object’s API Name:
Preview
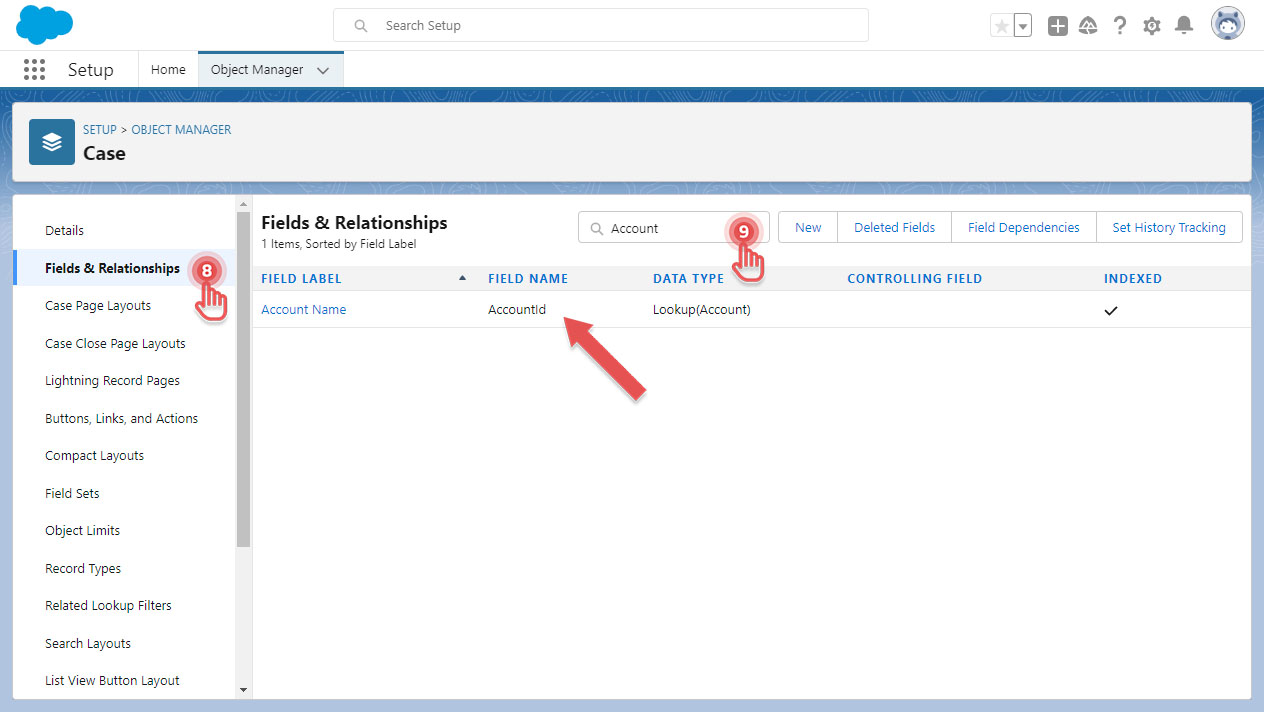
8. On the left side, click [Fields & Relationships] item.
9. Use Quick Find to search for “Account”.
10. Look for a field that has Data Type as “Lookup(Account)”.
Take a note of the Field Name:
Preview
You now have the required information and can continue to add a new Custom Account Map.
Add a Custom Account Map
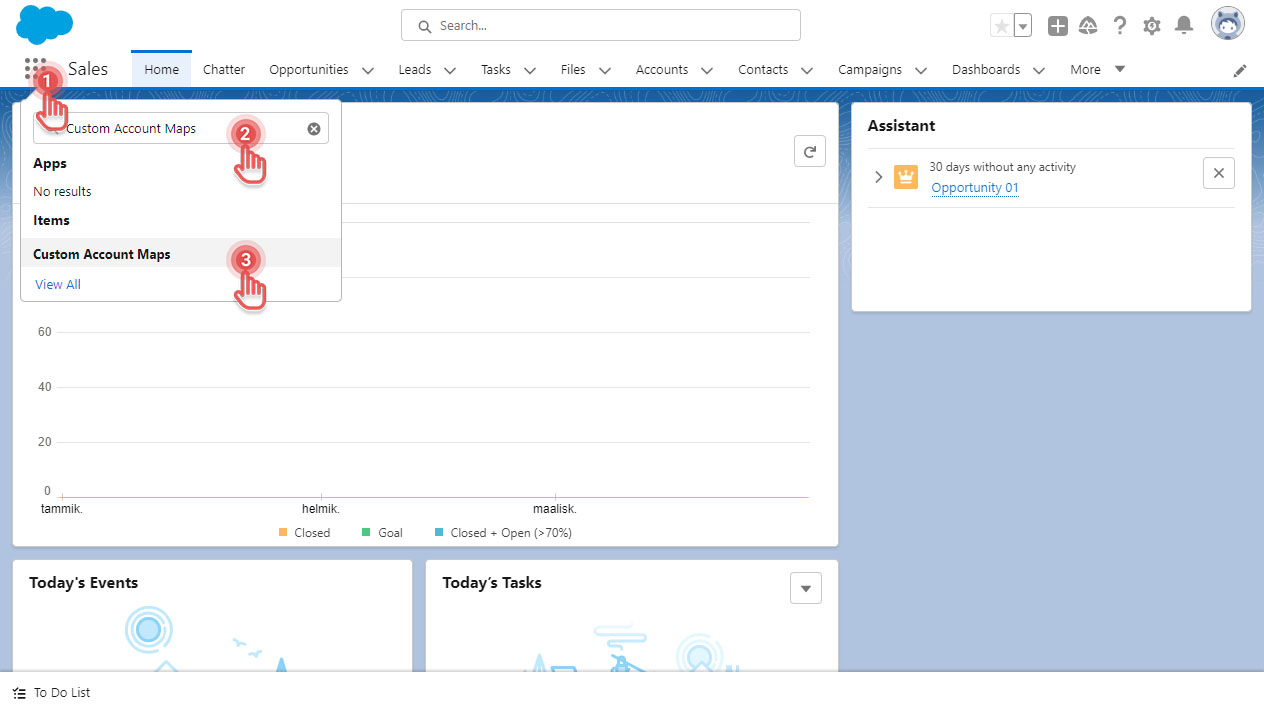
1. Click [App Launcher] button.
2. Search for “Custom Account Maps”.
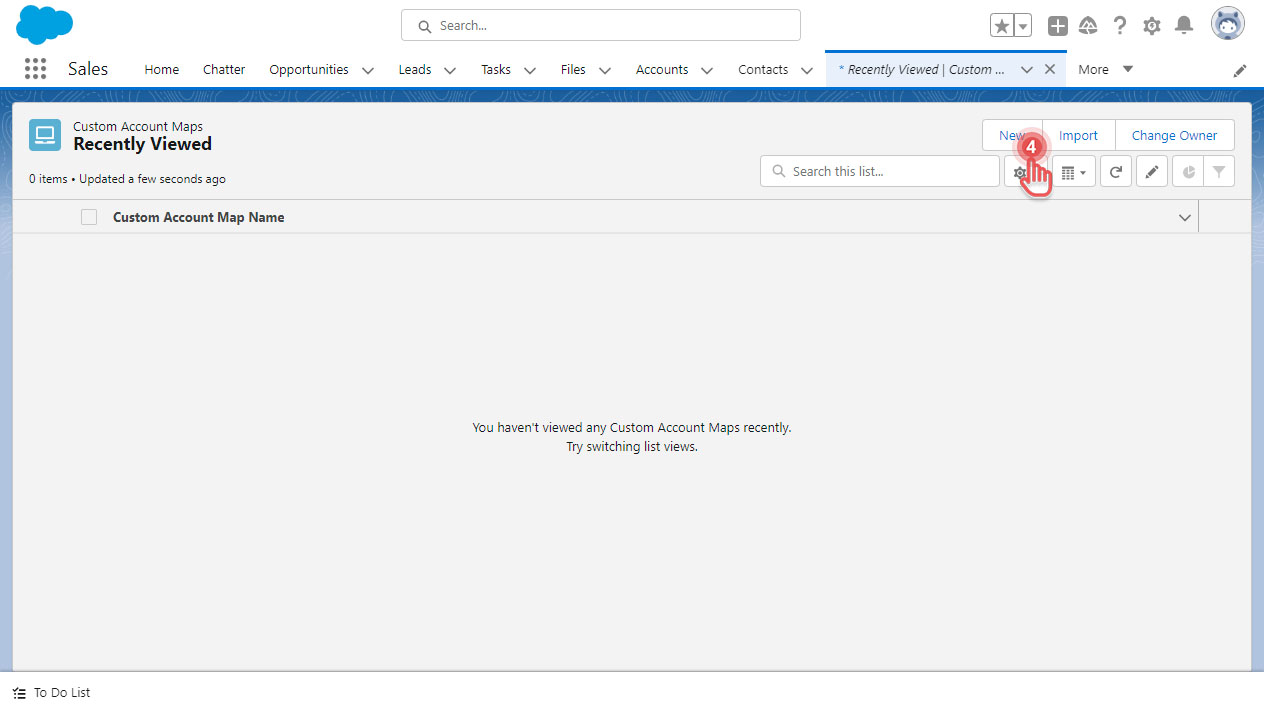
3. Click [Custom Account Maps] item.
Preview
4. On the top right corner, click [New] button.
Preview
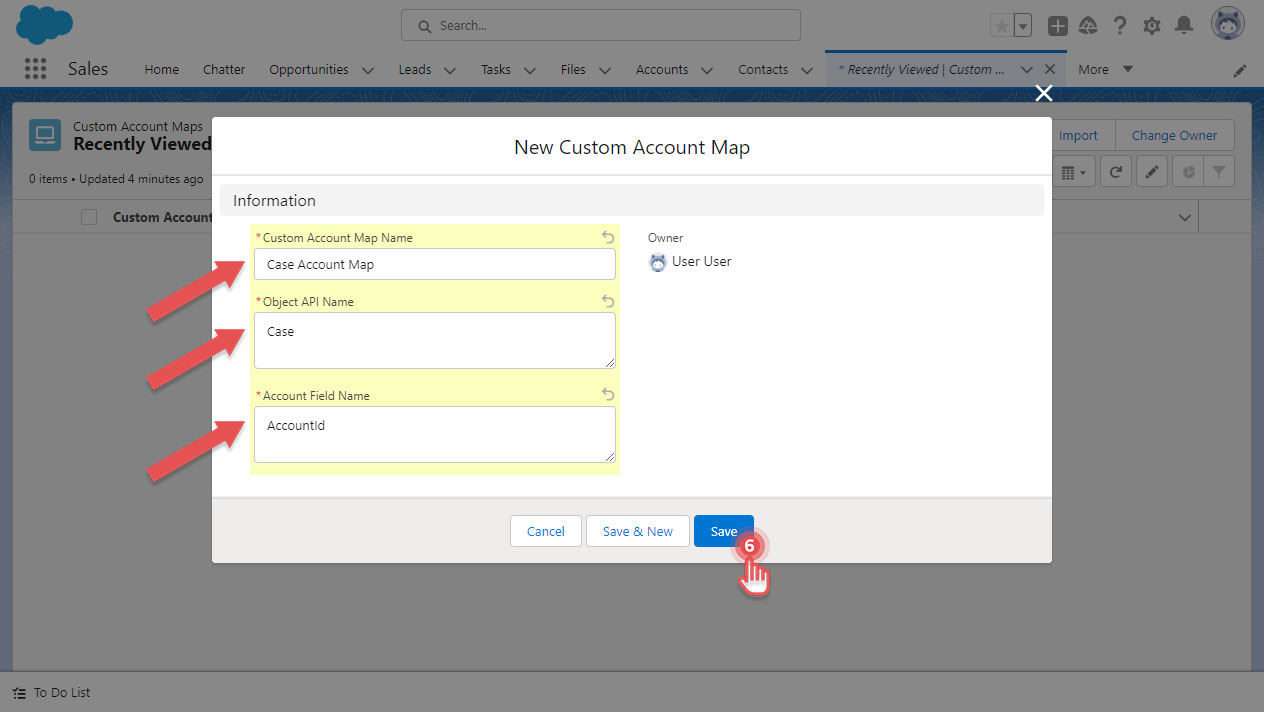
5. Fill in the data based on what you have gathered in the previous section above.
6. Once done, click [Save] button.
Preview
In this example, it is now possible to create Leap Project under Case’s records. And to continue, you would need to add Documill Leap’s custom components to Case’s record page layout: Adding Documill Leap's custom component to page layout .