Available to Project Owner.
An API Action Step sends a request to another system, such as Slack, when the workflow reaches it. It runs automatically and has no Collaborator. As a Project owner, you choose which API Action Template the step uses and fill in its parameter values.
API Action Templates are created by your Organization admin. See Managing API Action Templates .
Choose an API Action Template
-
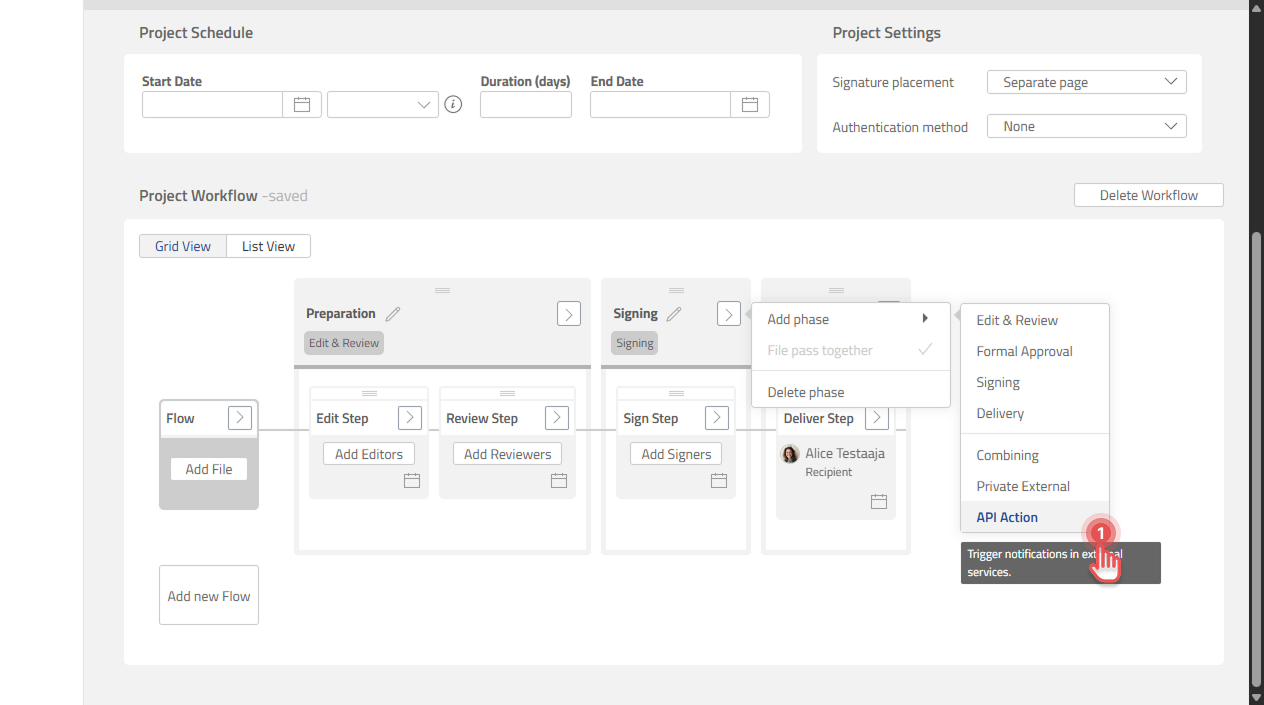
Add an API Action phase to the workflow where the request should be sent, for example after the Sign phase. See Add a Phase .
Preview
-
In the API Action Step, click [Configure].
-
In Select API Action template, find the template by name and click [Select].
Preview
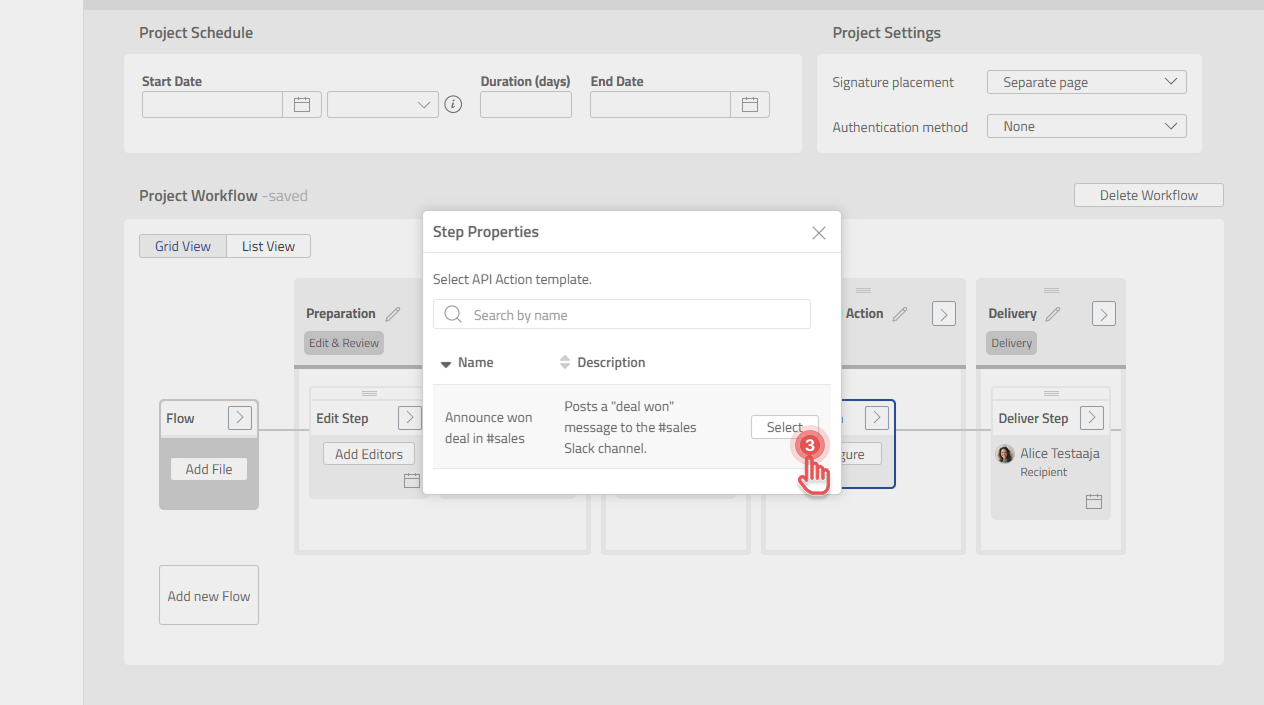
If the list says “No API Actions templates defined yet. Please contact your Organization Admin.”, ask your Organization admin to create a template first.
Change to a different template
-
Click [Configure] in the API Action Step.
-
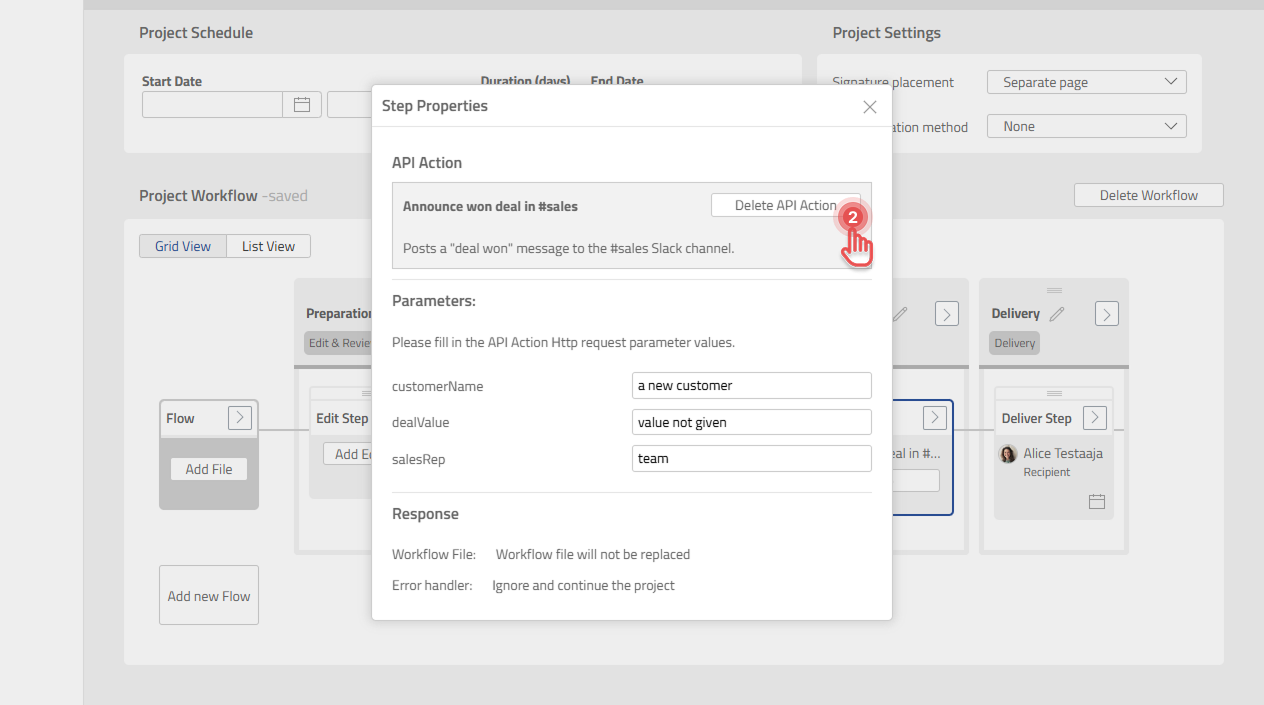
Click [Delete API Action]. This removes the template from the step only; the Organization's template is not deleted.
Click to expand...
-
Select another template from the list.
You can change the template and its values only while the step is upcoming. After the step has started, the details are shown read-only.
Fill in parameter values
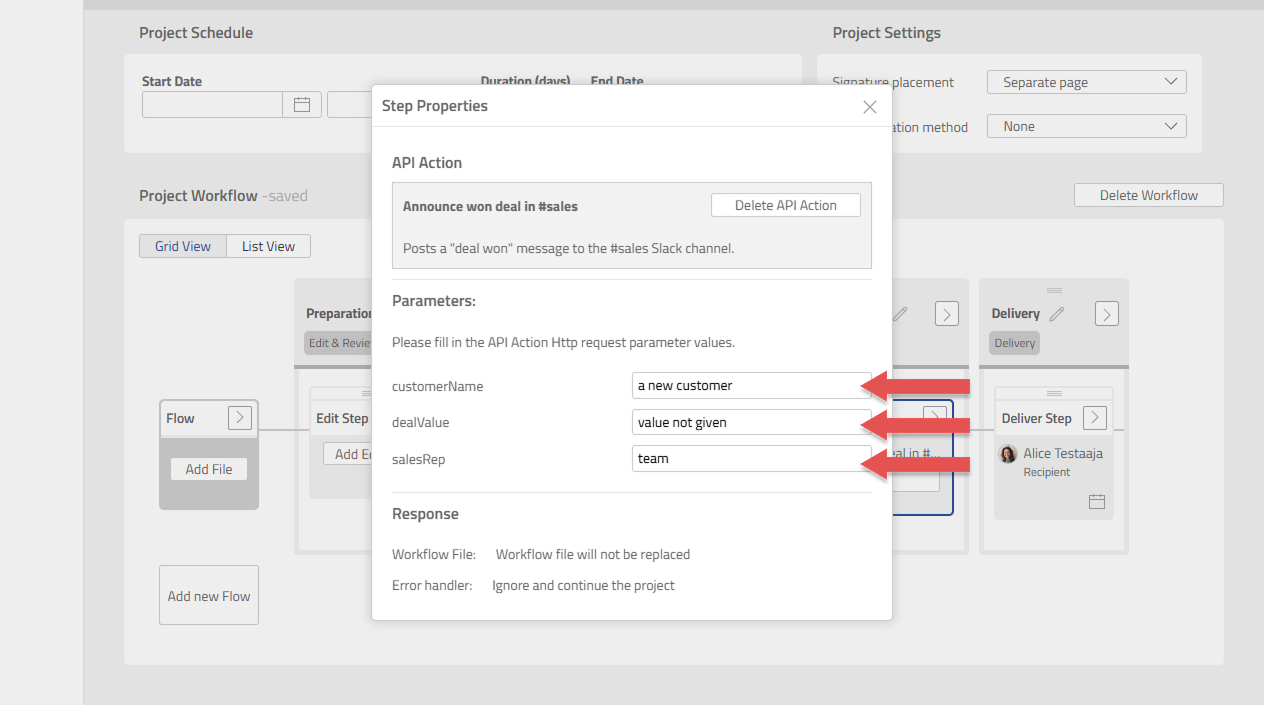
Many templates contain parameters, values that change from Project to Project, such as a customer name. The step dialog lists them under “Parameters” section.
-
Enter a value for each parameter. Each value can be up to 100 characters.
-
Click outside the field. The value is saved automatically.
If a parameter already shows a value, it is the default from the template. Keep it or replace it with the value for your Project.
The dialog also shows how the template handles the response:
|
Shown |
Meaning |
|---|---|
|
Workflow File |
Whether the file returned by the other system replaces the workflow file. |
|
Error handler |
What happens if the request fails. See When the request fails. |
Preview
When the step runs
When the workflow reaches the API Action Step, Documill Leap sends the request right away. Nobody needs to do anything, and the task is marked Completed when the request succeeds.
To check the result, open the API Action task details. They show whether the request was “Successful” or “Unsuccessful”.
Preview
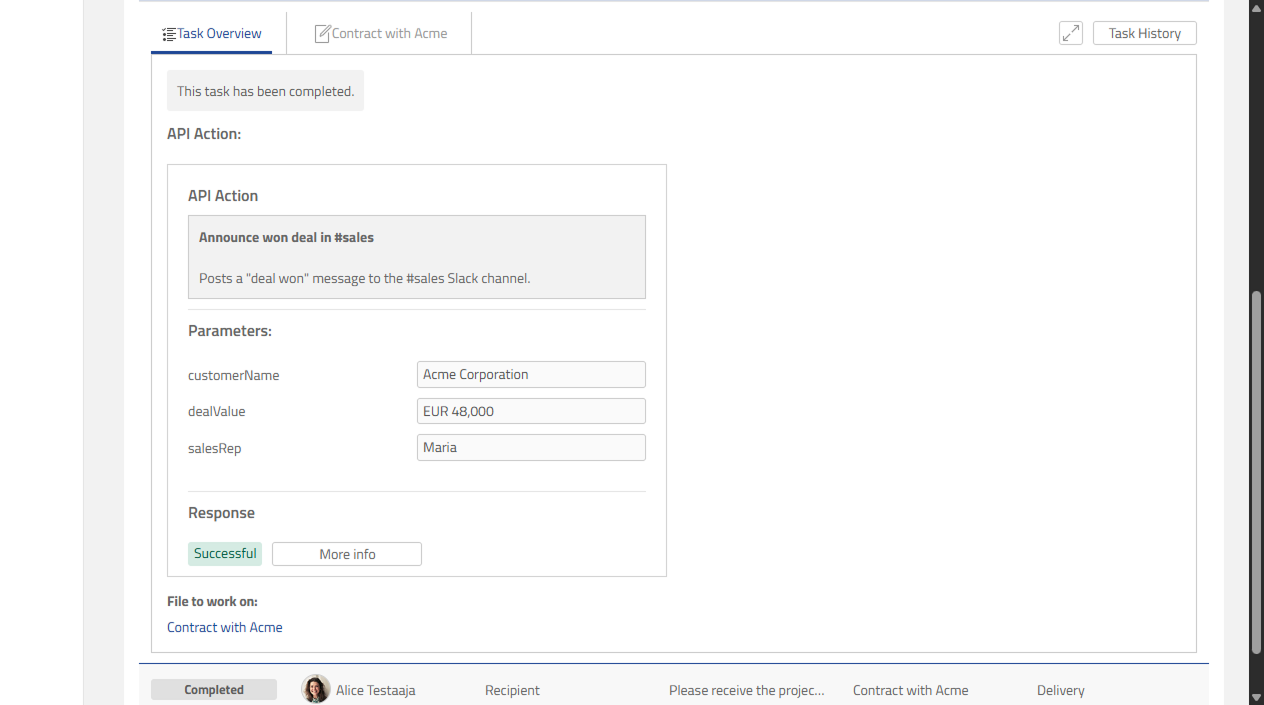
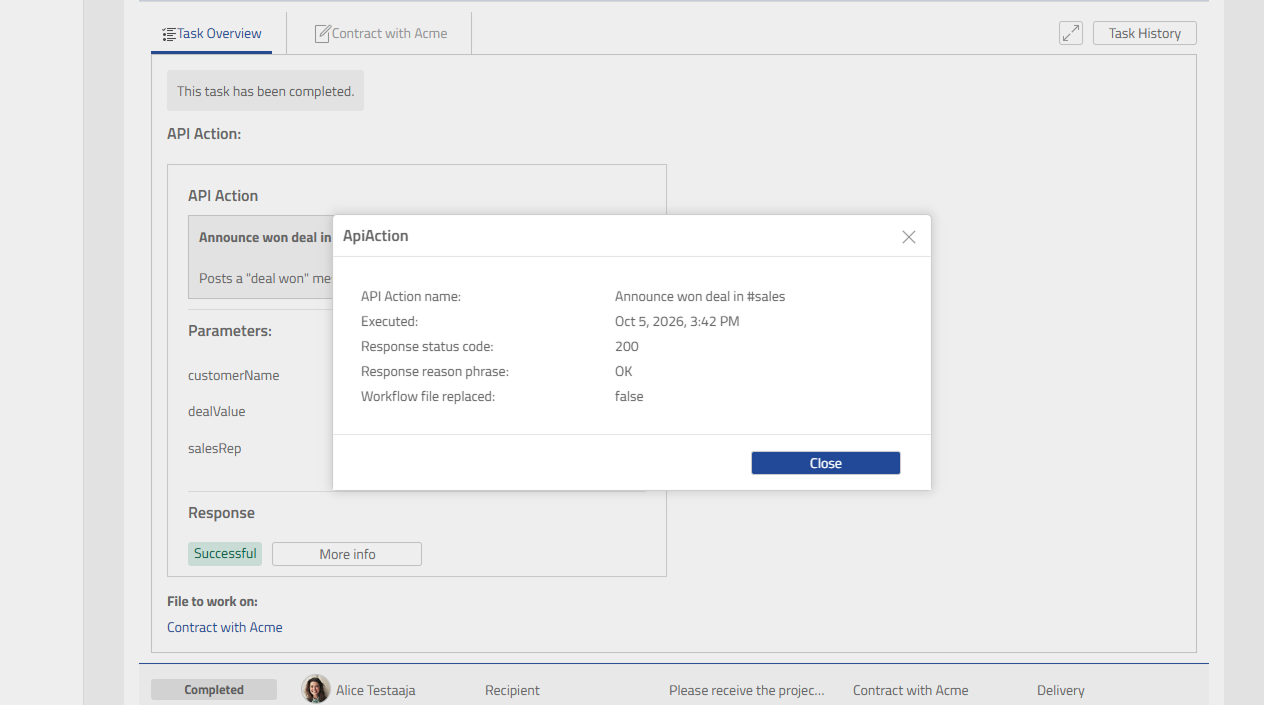
Click [More info] for the details:
|
Detail |
Description |
|---|---|
|
API Action name |
The template used. |
|
Executed |
When the request was sent. |
|
Response status code |
The status the other system returned, for example |
|
Response reason phrase |
The text for the status code, for example |
|
Response content |
What the other system returned. |
|
Error handling strategy |
Project continued. or Reported to project owner. |
|
Workflow file replaced |
Whether the workflow file was replaced with the response. |
Preview
The request also appears in the Project log.
When the request fails
What happens next depends on the template's Error handler:
|
Error handler |
What happens |
|---|---|
|
Ignore and continue the project |
The task is shown as “Unsuccessful”, and the workflow continues to the next phase. |
|
Let project owner decide |
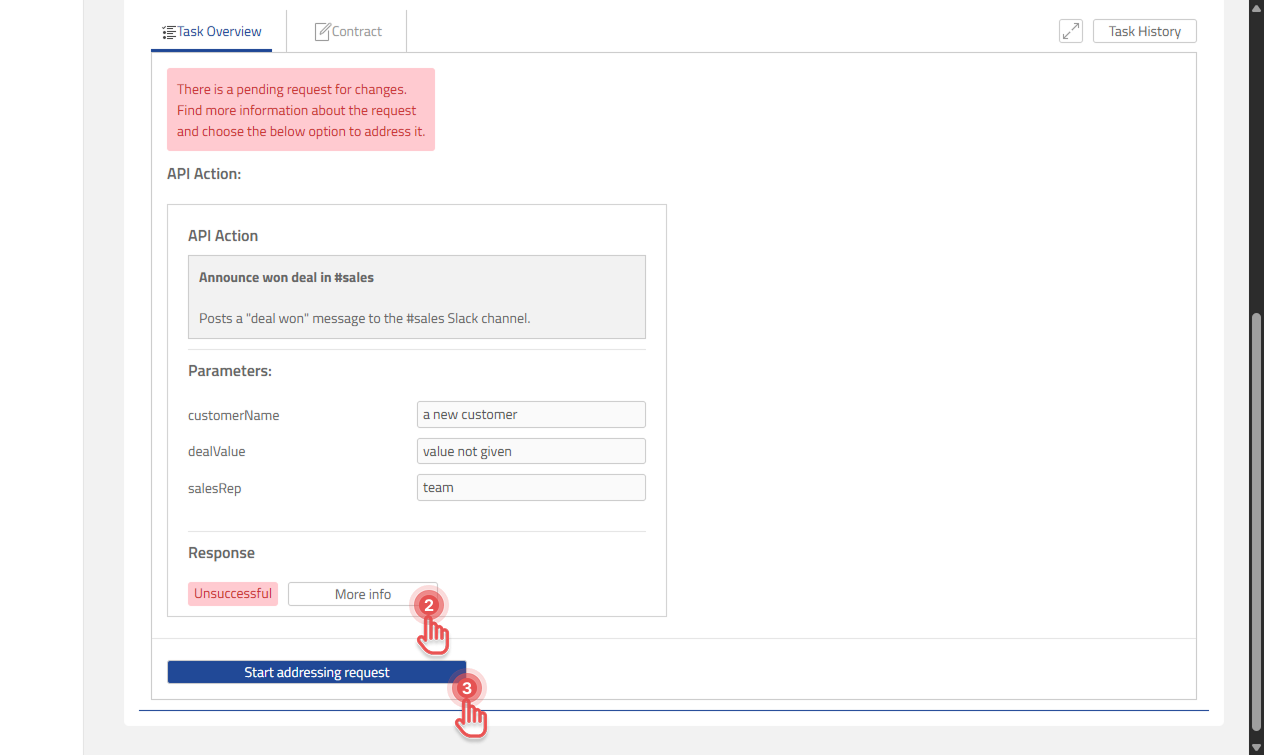
The workflow stops, and the Project owner gets a request to resolve it. |
To resolve a failed request:
-
Open the request from the API Action task.
-
If needed, click [More info] to see why it failed.
-
Click [Start addressing request].
Preview
-
Choose one of the options:
-
“Continue Workflow anyway”: the task is marked as done and the workflow continues.
-
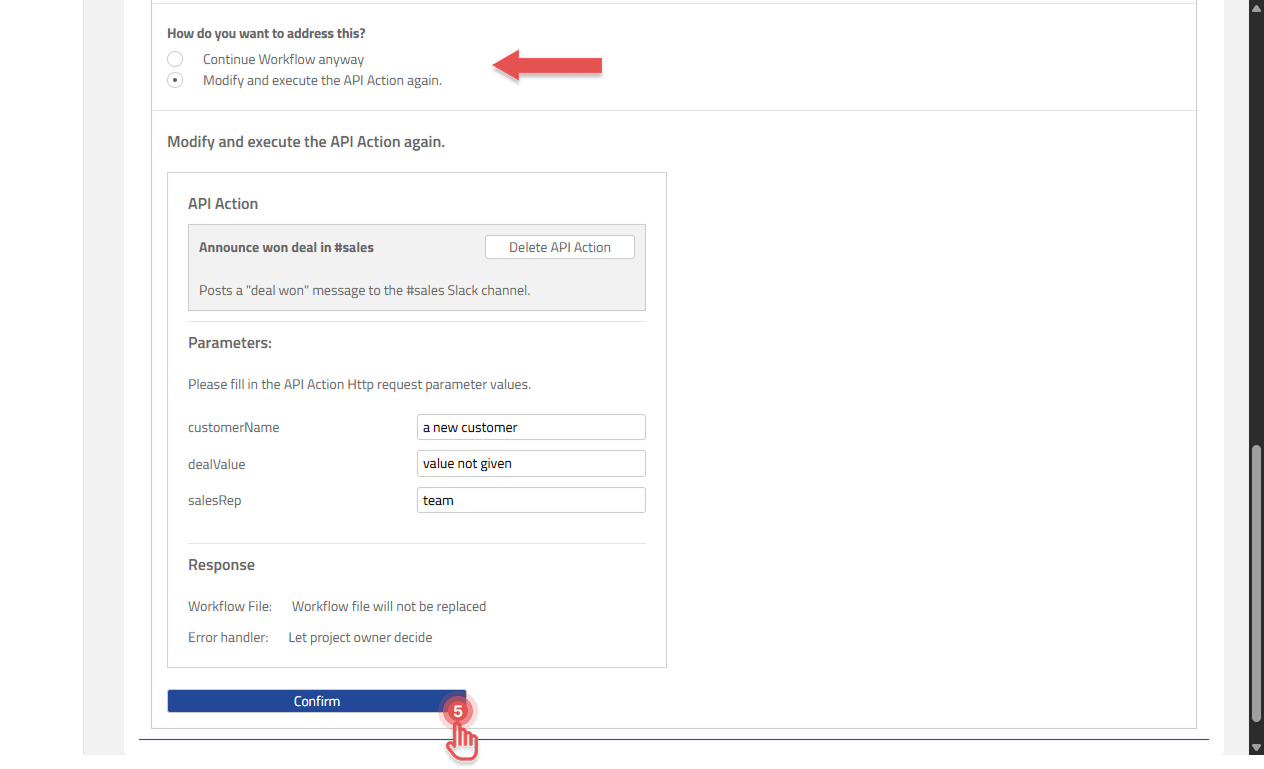
“Modify and execute the API Action again”: change the parameter values, or select a different template, and send the request again.
-
-
Optionally add a comment and click [Confirm].
Preview